Template:RSW
Cannonballs are ammunition used in the Dwarven Multicannon. They can be made by using a steel bar on a furnace giving 25.6 Smithing experience and 4 cannonballs per bar. In order to make this item, players must have completed the Dwarf Cannon quest and have an ammo mould in their inventory. They require level 35 Smithing to make.
Although extremely slow, players can smelt 1 iron ore and 2 coal to make the steel bars and then use them to make cannonballs without returning to a bank because cannonballs are made at a furnace. Using this method, a maximum of 36 cannonballs can be made from the contents of a single inventory containing nine pieces of iron ore, 18 lumps of coal, and an ammo mould. With the addition of a coal bag from Motherlode Mine, players could increase this to 17 steel bars per load, thus yielding 68 cannonballs in a single trip. Alternatively, players could also just have the steel bars prepared, which would be significantly faster than doing it from scratch, and bring a full load of 27 with an ammo mould to make 108 cannonballs. It takes exactly six seconds to convert one steel bar into four cannonballs so smelting the bars then making the cannonballs would take 162 seconds, which is rounded up to 2.7 minutes (2 minutes and 42 seconds) per trip. Making a cannonball uses the same animation to when a player buries bones.
Making them
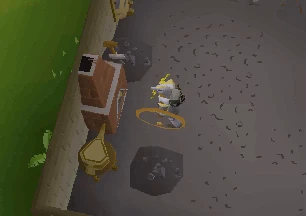
A player smithing cannonballs.
Making cannonballs is a popular method for players to train Smithing for free and reap profits. Optimal speeds would yield nearly 14,000 Smithing experience per hour from converting 540 steel bars into 2,160 cannonballs.
As mentioned earlier, smelting cannonballs is very slow. A full load (27 bars plus mould) takes 2 minutes and 42 seconds to complete or about two times slower than making iron bars. Doing this for money can be very useful, but it is not recommended to use for experience.
Compared to smelting iron ore with rings of forging, which disintegrate after 140 iron ores are smelted, and then forging the results, for instance, it will deliver less experience overall for the same time spent. However, it is financially rewarding even when players purchase the materials (either the iron and coal, or pre-made steel bars). Nonetheless, players are able to, at a minimum, still draw profits when they sell the cannonballs compared to breaking even or slightly profiting if the iron knife method was used instead.
- Note: Although this is true, players skilled at money-making may find that it is more efficient to use a quicker method to train Smithing (i.e. making knives or bolts, which requires less money than making armour) and use the time saved to make up for the money lost if any.
It saves time if you are at a furnace that is near a bank. The Port Phasmatys furnace is an ideal location, but with the addition of the Edgeville furnace, Edgeville surpasses Port Phasmatys. Nonetheless, it is recommended to wear an amulet of ghostspeak for faster banking for Port Phasmatys. It is accessed by worshiping the Ectofuntus or by travelling to Port Phasmatys via charter ship.
Another noteworthy furnace is in Neitiznot, but finishing The Fremennik Trials and starting The Fremennik Isles are required for access. If you can't get to either, a good place to do this is in Al-Kharid or Edgeville.
Dropping monsters
Template:ItemDropTableHead
|- style="text-align:center;" | style="text-align:left;" | Corporeal Beast | 785 | 2,000 | style="background:#56E156;" | Common |-
|- style="text-align:center;"
| style="text-align:left;" | Cerberus
| 318
| 50
| style="background:#FFED4C;" | Uncommon
|-
|- style="text-align:center;"
| style="text-align:left;" | Crazy archaeologist
| 204
| 150
| style="background:#FFED4C;" | Uncommon
|-
|- style="text-align:center;"
| style="text-align:left;" | Abyssal Sire
| 350
| 150
| style="background:#FFED4C;" | Uncommon
|-
|- style="text-align:center;"
| style="text-align:left;" | Venenatis
| 464
| 250
| style="background:#FFED4C;" | Uncommon
|-
|- style="text-align:center;"
| style="text-align:left;" | Callisto
| 470
| 250
| style="background:#FFED4C;" | Uncommon
|-
|- style="text-align:center;"
| style="text-align:left;" | Killerwatt
| 55
| 3
| style="background:#FFED4C;" | Uncommon
|-
|- style="text-align:center;"
| style="text-align:left;" | Vet'ion
| 454
| 250
| style="background:#FF863C;" | Rare
|-
|}
Ranged weapons | |
|---|---|
| Shortbows |
|
| Longbows |
|
| Composite bows | |
| Special bows |
|
| Crossbows |
|
| Ballistae | |
| Darts |
|
| Throwing knife | |
| Throwing axes |
|
| Chinchompas | |
| Other items |
|