

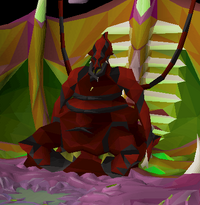
A player takes on the Abyssal Sire.
The Abyssal Sire is a level 85 Slayer boss that can only be killed when assigned Abyssal demons or the Sire itself.
It is mainly killed for its unsired drops, which can be used at the Font of Consumption to obtain valuable rewards such as the abyssal dagger, parts of the abyssal bludgeon, or the abyssal orphan pet.
Suggested skills[]
- 85
 (Required)
 - 75 (85+ Recommended)
- 75 (85+ Recommended)
- 75 (85+ Recommended)
- 75 (85+ Recommended)
- 80 (90+ Recommended)
- 75 (92+ Recommended)
Quests[]
Required[]
- Completion of the Enter the Abyss miniquest. (This is not needed if you have access to fairy rings.)
Recommended[]
- Partial completion of Fairytale II - Cure a Queen, up to the point where Fairy rings are accessed
- Completion Desert Treasure to use Shadow and Blood spells
- Completion of Barbarian Training up to the point where hastae can be wielded
- A much cheaper alternative is to complete Shadow of the Storm for Darklight, and visit the Catacombs of Kourend and kill monsters there for ancient shards in order to create Arclight.
Equipment[]
Phase 1 and respiratory systems[]
Unless using a Twisted bow, Ranged is only used to initiate the battle and for taking down the respiratory systems.
| Slot | Item (most effective → least effective) | ||||
|---|---|---|---|---|---|
| N/A | N/A | N/A | |||
| N/A | N/A | ||||
| N/A | |||||
| N/A | |||||
| N/A | |||||
| N/A | N/A | ||||
| N/A | N/A | ||||
| N/A | |||||
| N/A | N/A | N/A | |||
Magic is only used to initiate the battle and for taking down the respiratory systems.
| Slot | Item (most effective → least effective) | ||||
|---|---|---|---|---|---|
| N/A | N/A | N/A | |||
| N/A | N/A | ||||
| N/A | N/A | ||||
| N/A | |||||
| N/A | |||||
| N/A | |||||
| N/A | N/A | ||||
| N/A | N/A | ||||
| N/A | N/A | N/A | |||
Phase 2 onwards[]
Melee is only used for the second and final phase of the fight.
| Slot | Item (most effective → least effective) | ||||
|---|---|---|---|---|---|
| N/A | N/A | N/A | |||
| N/A | N/A | ||||
| N/A | |||||
| N/A | N/A | ||||
| N/A | N/A | ||||
| N/A | |||||
| N/A | |||||
| N/A | N/A | ||||
| N/A | |||||
| N/A | N/A | ||||
Inventory[]
- Lunar/Dramen staff (unnecessary with Elite Lumbridge & Draynor diaries completed)
- 4-5 Stamina potions (depending on how long you last)
- 8-12 Prayer potions or Super restores
- 1 Sanfew serum (in the event that you get poisoned) or Antidote++
- 1 Super combat potion
- Magic/Ranged weapon/armour to deal with the respiratory systems (i.e. switch equipment)
- If bringing a Ranged weapon, consider taking a ranged body and Ava's accumulator.
- Special attack weapon(s) if you are carrying one
- Runes for casting Shadow and Blood spells
- Rune pouch will greatly help in conserving inventory spaces for food or prayer potions. Runes to bring to cast blood and shadow barrage are: air, blood, death, and soul.
- High-level food for remaining inventory slots (Sharks or better)
Ranged is only recommended when replenishing hitpoints and stats through player-owned house. It is more likely to be quickly killed as the defensive bonuses are much lower, and when not using the ornate rejuvenation pool, healing would take too much of the time to be worth it.
Blowpipe can be more effective than Twisted bow when using Dragon darts, but due to the difference being very small and much more expensive, it is not recommended.
| Slot | Item (most effective → least effective) | ||||
|---|---|---|---|---|---|
| N/A | N/A | N/A | |||
| N/A | N/A | ||||
| N/A | |||||
| N/A | |||||
| N/A | N/A | N/A | |||
| N/A | N/A | N/A | |||
| N/A | N/A | ||||
| N/A | N/A | ||||
| N/A | N/A | ||||
| N/A | N/A | ||||
Inventory[]
- Lunar/Dramen staff (unnecessary with Elite Lumbridge & Draynor diaries completed)
- 2 Ranging potions
- 2 Super combat potions (for special attack)
- A form of antipoison (Antidote++ recommended)
- Teleport to house tablets, Max cape or Construction cape
- Runes to cast Smoke Barrage (air, soul, blood, death — Rune pouch recommended)
- Dragon warhammer and gear to make it more accurate
- Toxic blowpipe (for phase 1 only if using twisted bow)
- High-level food for remaining inventory slots (Sharks or better)
Inventory (PoH method)[]
- Lunar/Dramen staff (unnecessary with Elite Lumbridge & Draynor diaries completed)
- An antipoison potion of any type. Antidote++ lasts 12 minutes and is the cheapest.
- 2 Super combat potion
- 2 Ranging potion
- A prayer restore potion if low prayer
- Dragon warhammer or Bandos godsword
- Dragon warhammer should be used in conjunction with Mythical cape and Tyrannical ring (i) for maximum crush attack for special
- Magic/Ranged weapon/armour to deal with the respiratory systems (i.e. switch equipment)
- If bringing a Ranged weapon, consider taking a ranged body and Ava's accumulator.
- Runes for casting Shadow and Blood spells
- Rune pouch will greatly help in conserving inventory spaces for food or prayer potions. Runes to bring to cast blood and shadow barrage are: air, blood, death, and soul.
- High-level food (Monkfish or better)
- Teleport to House tablets
How to get there[]
The Abyssal Sire is located in the Abyssal Nexus, which is found in the Abyss. If you enter through the Mage of Zamorak, you will need to head to the south central section of the Abyss to reach the Abyssal Nexus.
The far safer way to access is through use of the fairy ring network. You will need to have access to the fairy rings, which is accessed after partial completion of Fairytale II - Cure a Queen. Use the code DIP and you will be sent straight to the Abyssal Nexus without being skulled and losing all of your prayer points.
There are four Sires in each world, in the north-east, north-west, south-east and southwestern areas of the Nexus. There are four eyes near the Font of Consumption; interacting with them will tell you if there is another player in that chamber.
Attacks & abilities[]
- Melee attack: Only used during Phase 2 of the fight. There are three different types of Melee attacks which affect the damage the Sire does. Even though the Sire can hit through protection prayers, it is still advised to use Protect from Melee as it reduces the accuracy and strength of its attacks.
- Swipe: The Sire swipes its right arm at the player, dealing 2-6 damage through Prayer.
- Back swipe (1x): The Sire uses one the tendrils in its back to swipe at the player, dealing slightly more damage than an arm swipe.
- Back swipe (2x): The Sire uses both tendrils in its back to swipe at the player, dealing up to 26 damage through prayer.
- Discharge: If the player attacks the Sire from a distance that it cannot retaliate back, it will forcibly teleport the player next to it, before discharging a small amount of energy for low typeless damage.
- Tentacles: Six tentacles are in each Sire chamber, guarding the respiratory systems. They are only active during Phases 1 and 3 of the fight, and attack with typeless crush, which can deal up to 30 damage.
- Spawns: The Sire is capable of summoning spawns to assist it in battle. During Phases 1 and 2, the Sire will occasionally launch a spawn out from its mouth, which will land around the Sire. The spawn is aggressive, has 15 Hitpoints, and uses inaccurate Melee/Ranged attacks. If it is not killed in 10 seconds, it will mature into a scion, which is stronger, more accurate and can hit through protection prayers.
- Portal: This attack only occurs during the last phase. When the Sire reaches 139 Hitpoints or lower, it will forcibly teleport the player next to it. It will then explode for up to 72 damage if the player does not get far enough and continually summons up to 10-14 spawns until it dies.
Fight overview[]

The poisonous fumes that players must avoid.
The Sire is a solo-only boss, despite being in a multi-combat area. This means that other players cannot assist in the fight (although they can drop supplies if desired). The Sire and the spawn/scions will only attack the challenger; however, some of the Sire's attacks can indirectly hit other players if they are within range. Spawn/scions can focus on other players, but will be unable to attack them.
All of the chambers are identical to each other; the only difference they have is the path to the chambers.
Note: When killing the Sire, make sure that Auto Retaliate is off.
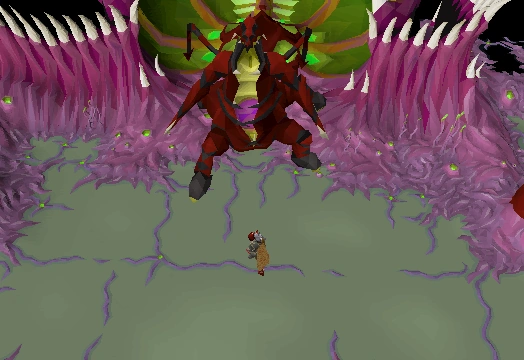
Phase 1[]

The Abyssal Sire in stasis.
The fight begins when the player attacks the sleeping Sire. The Sire and the tentacles will awaken and the battle will begin. The Sire only uses poison fumes and spawn launching against the player during this phase. In order to progress to the next phase, the four respiratory systems in the room must be destroyed. The tentacles are much of a hindrance during this phase, as they'll block all incoming damage to the systems greatly, with the player only being able to deal up to 3 damage regardless of their equipment.
This can be bypassed by disorienting the Sire:
- Deal 75 damage against the Sire (with ranged or magic)
- Use Shadow spells against the Sire (damage is not required, splashing will work):
- Shadow Rush: 25%
- Shadow Burst: 50%
- Shadow Blitz: 75%
- Shadow Barrage: 100%
When disoriented, the Sire and the tentacles will be stunned. When the tentacles start to wake, run back to the Sire and cast a shadow spell until it is disoriented. If you are casting anything below Shadow Barrage, you may need to use multiple shadow spells to disorient it. The respiratory systems can only be attacked with either Magic or Ranged; a Toxic blowpipe on rapid is recommended to destroy them quickly. A crystal bow can also be used; while slower, it does have much more range and results in you running a bit less.
Note that as of the 24 August 2017 update, the slayer helmet's effects will now work on the respiratory systems, so they should fall quickly to your weapon of choice against them. If the systems are killed at a reasonable rate, only two spells will be needed at most (more if using shadow spells other than barrage).

Stand on any spot along this vein as you await the Sire to start Phase 2.
The optimal procedure for this stage is as follows:
- Hit the Sire once at the beginning with your blowpipe on "Long Range" (change to "Rapid" quickly) and disorient it with your shadow spell.
- Attempt to take out two respiratory systems on one side (preferably the east ones first).
- Return to the Sire and cast shadow spells until it is disoriented, then take out the two respiratory systems on the other side. (If one of the respiratory systems on your first side survived your attacks, destroy that first).
- Switch to Melee gear and Protect from Melee for Phase 2. (See the image to the right for the best spot to prepare for Phase 2.)
Phase 2[]
Note: At this point, the player must kill the Sire or the whole fight will be reset. The Sire will return into the chamber if it is not attacked for one minute. If the first attacker dies/leaves, another player can attack after 10-20 seconds have passed.
The Sire will leave its resting place and will attack the player with Melee. Use Protect from Melee; while the Sire can hit through protection prayers, it's damage is greatly reduced, especially its double tendril attack, which can hit up to 60 if not protected against. The Sire can still summon spawns and launch poisonous fumes during this phase. Any spawns that are summoned should be killed immediately unless the Sire's health is low, as they can be problematic if left alive while its health is high.
During this phase, all six tentacles in the chamber will be disabled, so they will be unable to damage the player during this part of the fight. However, safespotting the Sire will result in it forcibly teleporting the player next to it, before following with an unblockable attack dealing moderate damage.
Once the Sire is damaged to below half Hitpoints, Phase 3 will begin. Switch back to Protect from Missiles during the phase transition animation. Note that any attacks dealt to the Sire when it is below 200 hitpoints will deal no damage to it.
Phase 3[]
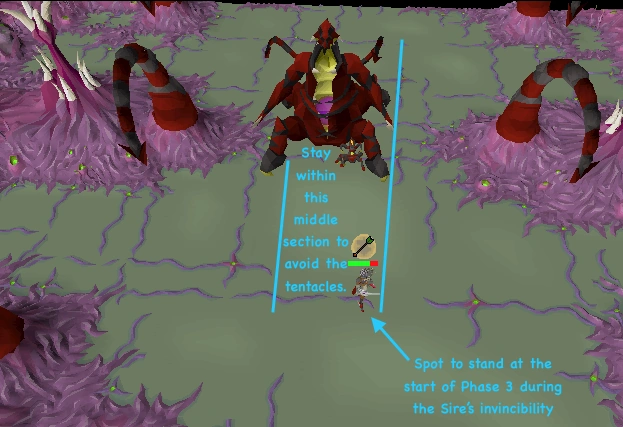

Stay within the middle area to avoid damage from tentacles.
Stage I[]
The Sire walks to the middle of the area, and will stop attacking with Melee. As soon as it finishes attaching itself to the ground, four spawns will appear. It will only throw out poisonous fumes as its only attack at this stage. In addition, the Sire gets increased Hitpoint regeneration; it seems to be random, as there are cases where it slowly regenerates health (less than 1%), while in other cases it can rapidly regenerate health (1-2% every 2.4 ticks). The tentacles will also awake again, though they can still be easily avoided if standing in the middle.
The poisonous fumes can be easily avoided by moving back and forth. Select two tiles that are within melee range (make sure they're out of the reach of the tentacles), attacking the Sire in a 1-2 format. If health falls low, run south of the Sire and cast blood spells on the scions or let them die off before running back to attack it again.
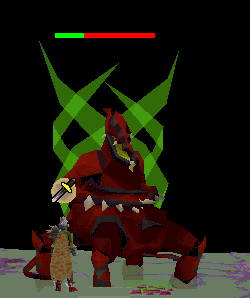
Once the Sire reaches 139 Hitpoints or lower, stage two of this phase begins.
Stage II[]
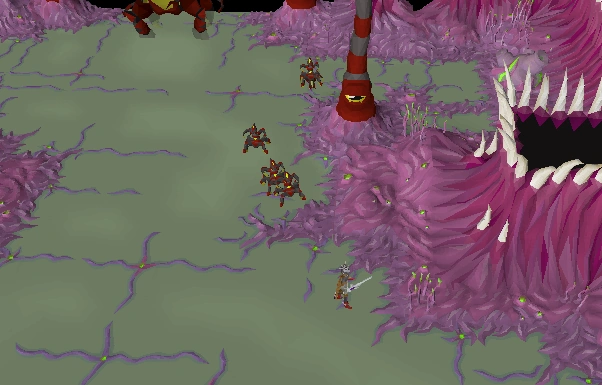
The Sire opens a large portal within its body, causing spawns to emerge until it dies.
As soon as the Sire reaches 139 Hitpoints or lower, the next attack the player does will teleport the player south of the Sire. This attack doesn't deal any damage (as with all phase transitions). The Sire will explode two ticks after teleporting the player, dealing massive damage if you don't move away in time. It can be simply avoided by running at least two tiles away from it. Up to 14 spawns will appear afterwards, appearing underneath the Sire or dropping around the player's location.
Be aware that the Sire will follow up the explosion with three more poisonous fume attacks; after that, it will occasionally send one fume at a time (although it can stack up to 3 fumes). Keep attacking the Sire, going under and behind it so the summoned scions will take slightly longer to reach you. Players with a dragon or crystal halberd can use the special to quickly kill the Sire before the summoned spawns turn into scions.

The southeastern safe spot to heal off the minions.
If you need to heal yourself, lure the spawns/scions while casting Blood Burst/Blood Barrage; their negative Magic Defence should ensure that your spells will hit and heal a large portion of your health, even if you have a negative magic bonus. This should be done when the player is near the southern area of the chamber, as there are two spots where players can safely cast blood spells on the minions (one is shown to the right).
When finished, run back up to the Sire, attack it once from the front, then move back and attack twice so that the minions will have to catch up to you; be wary of any poisonous fumes that appear while you do this. Keep attacking the Sire until it dies.
If using the twisted bow, one can simply trap the minions behind the middle tentacles and range it from afar, as the Sire will not forcibly teleport players during this stage.
Using the POH method[]
Awaken Abyssal Sire to start a fight. Once it is killed, awaken it again, then either disable two or all four respiratory systems. When either one is achieved, teleport back to your house with Teleport to house tabs, drink from your Ornate rejuvenation pool, then use the fairy ring to return to the Abyss. If you do not have both features, head to world 330 (the official player-owned-houses world) and enter a host's house to use both features. It's recommended to have your house set to Rimmington as this is where most hosts reside.
With this method, you use little to no prayer potions/stamina potions, food, Blood Burst/Barrage casts, which results in more net profit per trip. Other advantages of this include the ability to use all your special energy each kill and have space to pick up your drops. Without the house, you would only be able to use one special attack each kill (to maintain special energy) and have to "juggle" any drops that you cannot carry until enough supplies are depleted.