Details
| Start point | |
| Official difficulty | Experienced |
| Description | Recent forays into Morytania by some of Saradomin's more fanatical supporters have unearthed murky rumours concerning an abandoned mine in the south. Legend speaks of an unusual material, hidden in the depths of the mines, that is somehow linked to the desolation and fear that now surrounds the place. Do you have the nerve to find out more, and enter the haunted mines of Morytania? |
| Length | Long |
| Requirements | 15 |
| Items required |
|
| Enemies to defeat | Treus Dayth (Level 95) |
Walkthrough
Starting out

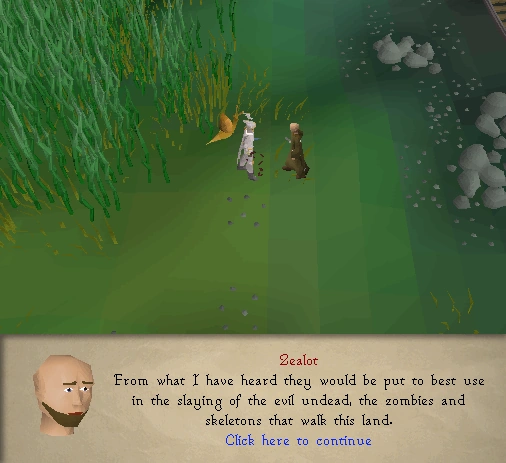
The zealot.
For the boss fight, high level food is strongly recommended, as you will take a lot of damage at all levels.
Bring all the items required to finish the quest, including supplies for the boss fight. To begin the quest, players need to head to the Abandoned Mine, which can be found in the southwest part of the Morytania Swamps. From Canifis, head west and enter the swamps through the gate. Travel south along the River Salve. Begin along the long winding path to Mort'ton. At the most southwest part of the path is the starting point of this quest. Look for a grey field on the minimap.
Travel times may be shortened by using the following Fairy Ring codes:
- CKS - west of Canifis at the entrance gate of the swamp
- DLS - Myreque Hideout near the Barrows area
- BKR - center of the swamp just northwest of the Barrows boat
Provided that you have completed the Shades of Mort'ton quest, you can use the Shades of Mort'ton teleport in the minigames tab.
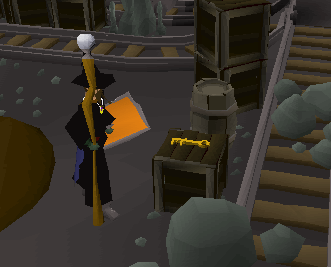
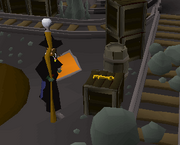
Saradomist Zealot
In the area east of the Haunted Mine, Zealot is walking around. Talk to him and he will tell you about the secret cave and the Salve amulet. He has a key, but will refuse to give it to the player. Pickpocket Zealot to get Zealot's key, which is needed later in the quest.
Warning: There are level 61 Vampires in this next area!
Walk south of Zealot to a cart track with two carts. Jump over the first and walk past the second. Go through the cave entrance.
Cave level 1
In the cave, follow the cart track west. Ignore the two ladders going down and continue west through the cave exit to end up outside next to the River Salve. Walk south following the tracks to a second cave entrance. Once inside, go east. You will find a ladder at the end of the blocked path. Go down the ladder to the next level in the cave.
Cave level 2
Head directly east and go down another ladder.
Cave level 3
Follow the path to the cart track running north to south. Do not get hit by the mine cart that is moving north to south on the track. Wait for the cart to head south. Follow the cart south and wait in the safe spot (alcove) on the west side of the track. When the cart passes north, run south to the ladder. Climb down to Cave Level 4.
Cave level 4

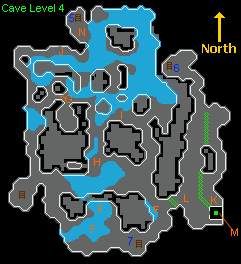
Cave level 4 map.
The level 4 cave has several landmarks which are marked on the map to the right. The corresponding letters show the locations of each landmark.
- (F) the glowing fungi
- (G) the point-set panel (map of mine tracks)
- (H) the cart
- (I) the levers A, B, C, D, and E
- (J) the levers F, G, H, I, J, and K
- (K) the water valve
- (L) a chisel spawn
- (M) the water-powered lift
Glowing fungus
The player is currently at ladder (7) in the south part of the map. Head northeast and pick a Glowing fungus (F) on the west side of the path.
The Glowing fungus is the light source required to access the deepest level of the mines. Unfortunately, daylight exposure will cause them to crumble to ashes so do not take glowing fungi outside of the cave. Instead, the complex system of mine carts will be used to transport the fungi light source to the correct part of the cave.
The cart
After picking a glowing fungus (F), continue northwest. On the west side of a pool is a searchable cart. Place the fungus in the cart (H).
The track map
The mine cart route solution.
From the mine cart, head north and then west to the track map (G) which operates the cart system. Click the points settings panel on the northern wall of the corridor.
Pressing the red start button sets the cart system in motion. The objective is to get the cart from the start position on the left to the exit point at the ladder in the top right corner. Look at the directional arrows highlighted in red in the picture. Note which levers need to be pulled in order to match your track map to the solution map.

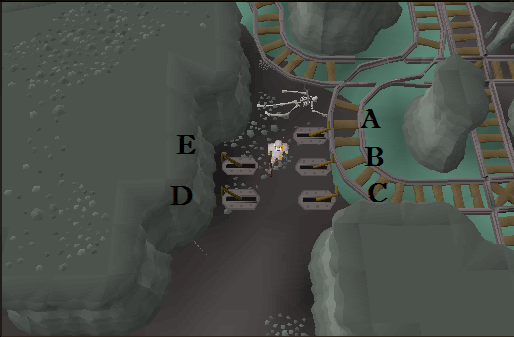
Levers A-E.

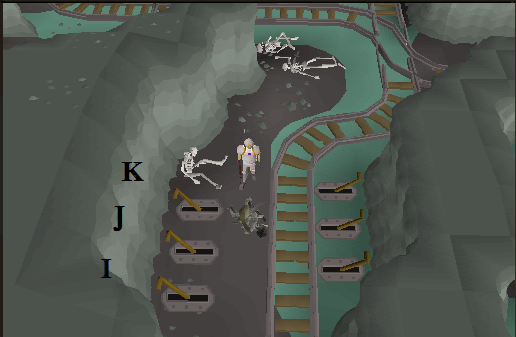
Levers F-K.
The switches A, B, C, D, and E on the track map correspond to levers that can be found at location (I) on the Cave Level 4 map. Levers F, G, H, I, J, and K are at location (J). Right click examine each lever or refer to the images to understand their exact placements.
First go to location (I) by heading southeast and then north. Click the levers that correspond to the intersections on your track map that need to be switched.
Next, go to location (J) by returning to the track map panel and continuing northwest. Again, click the levers that correspond to the intersections on your track map that need to be switched.
Go back to the track map (G). Check to make sure that the route on your map directs the mine cart to the ladder. Then operate the mine cart by pressing the red button, and the map will show the path of the mine cart.
If a setting is incorrect, the cart ends up in the wrong location. When that happens, the glowing fungus is removed from the cart. In that case, pick another glowing fungus and put it in the cart (H). Operate the appropriate levers to fix the problem and hit the red button again.
The location of the cart is next to the northwest stairs (5) shown in the Cave Level 4 map above.
Finding the cart again
Players now need to get to the cart's new location. Starting from Cave Level 4:
- Go up the ladder (7) near the glowing fungi spawn to Cave Level 3.
- Walk north on the track, avoiding the cart. Take the first path to the east. Climb up the ladder at the end of the path to arrive on Cave Level 2.
- Go west and up the ladder to Cave Level 1.
- Go west and exit the cave to the River Salve.
- Go north and enter the northern cave.
- Climb down the first ladder immediately to the east to arrive back on Cave Level 2.
- Head northeast. Climb down the ladder to Cave Level 3.
- Go northwest to the corner of the cave and climb down the ladder. Search the nearby cart and take the glowing fungus that was put in earlier. If there is no fungus in the cart, repeat the previous process starting by placing a new glowing fungus in cart (H).
Water valve
Go back up the ladder. Head east past a ladder and then south past a moving cart. Climb down the ladder to arrive at Cave Level 4.
Head southeast down the right corridor. Pick up the chisel from the spawn on top of a crate if you did not bring one. Locate the water valve on the east side of the large pipe. Use Zealot's Key on the valve to activate the water flow. A ghost will appear and will try to shut off the valve. Run quickly around the water pipe system to the elevator lift and "take elevator down" to Cave Level 5. The elevator remains operational after the initial activation, so the Zealot's key is no longer needed. Zealot can be pick-pocketed again to obtain another key.
The elevator will drop the player into a pool of water. From the elevator, walk south onto the track and follow it to the east. Proceed down the staircase. With the glowing fungus, the cave will be properly lit. Go west through the door to a big room with cranes and carts. This room is where the boss fight will take place. Do not take the key until you are completely ready to begin!
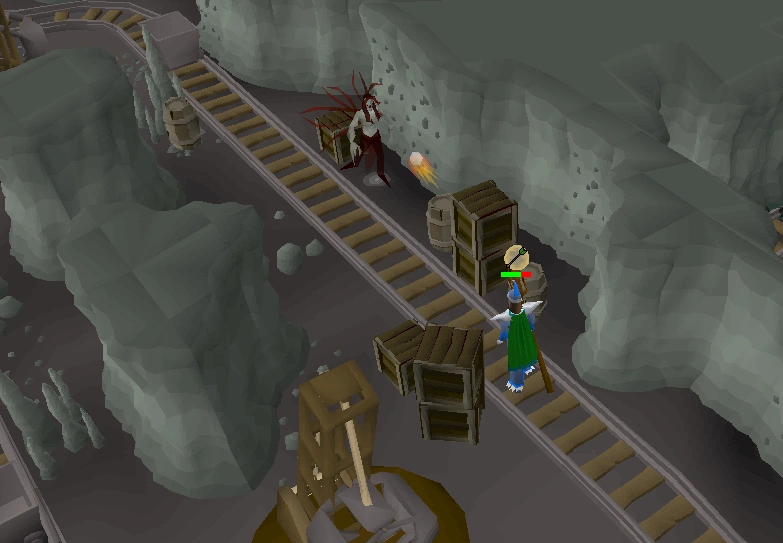
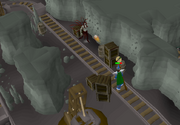
The ghost fight
The crystal mine key appears suspiciously easy to take.
This boss fight is difficult and should not be taken lightly. Players of all levels take high damage and a full inventory of food is most likely necessary. The surrounding environment is more dangerous than the actual ghost.
During the fight, carts and cranes around the room will start to operate and can cause major harm, so players should avoid them when possible. The cranes are stationary and can hit hard, but they are inaccurate and easily avoided by staying out of their reach. The carts can only move along the track they are on, similar to the other carts in the dungeon. However, these carts are dangerous because they can hit hard - rapidly up to 7 damage while dragging a player along the track. Additionally, pickaxes will be constantly thrown at the player during the fight, hitting as much as 10 damage in one attack, so, even though it won't protect 100 %, Protect from Missiles is recommended for this fight.
Range is very effective against him.
A player fighting Treus Dayth.
To start the fight, try to pick up the innocent looking key. The ghost Treus Dayth will appear and will start to attack after a small cut scene introduction. He is level 95. He will be identified on the minimap as a flashing yellow arrow. When chasing the Treus Dayth, try to stay out of the way of the moving carts and the cranes. The ghost itself is not that strong, but the damage from the environment can be serious. The ghost will continually teleport after some hits are dealt which makes killing this boss very difficult without energy/super energy potions. A large supply of food and optionally potions is advised depending on your combat level. An emergency teleport, like the Ectophial is very useful too. It is not possible to freeze the ghost from moving using Magic or Ancient Magicks. Crumble Undead works well against him.
An example strategy that works quite well: Bring a 4-dose prayer potion, optionally a ranging potion, and the best range weaponry you can muster, along with an inventory filled with food. Use Protect from Missiles at all times. When you reach Treus Dayth, switch on Eagle Eye to make your shot count, shoot, and then switch it off when he moves away (keep Protect from Missiles on). He likes moving between the northwestern and northeastern side of the room, in which case you are recommended to run along the northernmost cart track in the detached tunnel, where you only have to dodge one cart. If he moves south, try to hug the cavern walls to avoid the cranes as you approach him. However, don't hesitate while fighting - it's better to take a bit of extra damage and be faster than be indecisive and suffer as a result. Before fighting, you are also recommended to explore the room and practice how you are going to move around without taking too much damage - the machinery doesn't activate before the fight.
Getting the crystal
The long sought-after crystal mine.
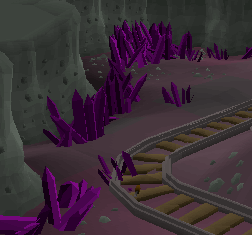
After defeating Treus Dayth, pick up the innocent looking Crystal-mine key. Now head back east through the door and climb up the stairs. Walk west until you reach another staircase and head down. Walk down the corridor. The innocent key opens the large door to a room with a crystal outcrop in the southeast corner. Use a chisel to cut a piece from the crystal outcrop. If you forgot your chisel, go back up the lift and pick a chisel on a crate. You will obtain a Salve shard. Quest Complete!
Reward
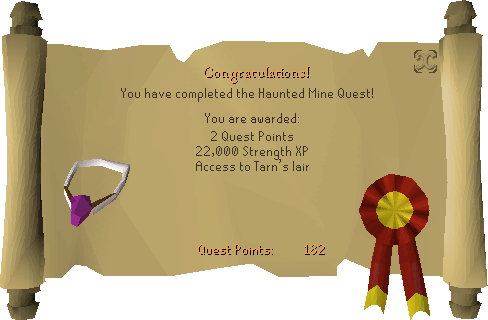
- 2 Quest points
- 22,000 Strength experience
- Ability to make Salve amulets, giving combat bonuses against: Zombies, Skeletons, Ghosts, Banshees, Crawling Hands, Ankou , Aberrant spectres and Shades (Mort'ton)
- Access to Tarn's lair
Additional tips
- Multiple salve shards can be obtained using the drop trick.
- Players can use a Ball of wool on a Salve shard to make a Salve amulet.
- The mining key obtained after killing the ghost, can be put on a steel key ring.
Trivia
- The Mischievous ghost who attempts to shut the water valve and stop the lift will wail "wooo ooo oooo" even when wearing a ghostspeak amulet.