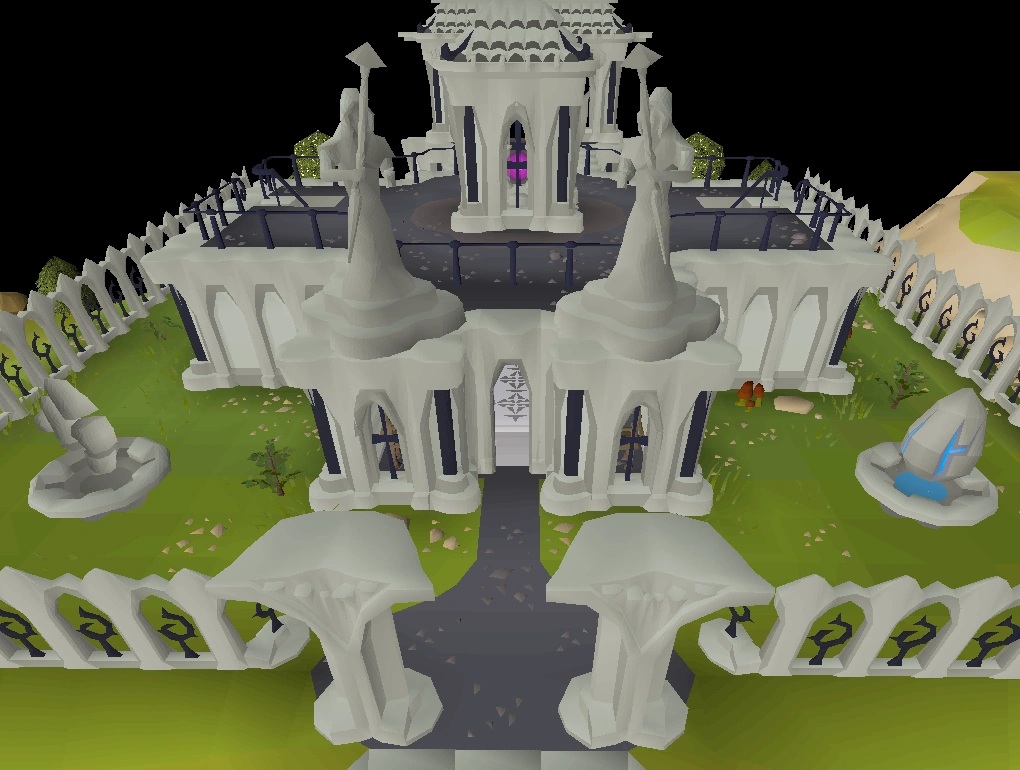
  North of the Duel Arena is the Mage Training Arena. | ||||
| Location on World Map | ||||
| Al Kharid Mine | ← | Mage Training Arena | → | River Salve |
The Mage Training Arena is a member's only Magic minigame located to the north of the Duel Arena. Using various spells, players earn Pizazz points in different minigames which they can use to buy items in a shop on the top floor of the arena. This is not to be confused with the Mage Arena, which is a dangerous Wilderness minigame.
History
After the discovery of Runes by humans, many accidents occurred as inexperienced mages attempted difficult spells. The wizards of the original Wizards' Tower created the arena and the various guardians so that mages could train with the more mundane spells. Unfortunately, it was destroyed by warriors and rangers that were angered by the new art of Magic. Recently, the current denizens of the Wizards' Tower have recreated the Arena and Guardians and have also developed charmed warriors to defend the arena against further attacks.
Requirements
33 magic is required to participate in each of the available activities. Higher level spells increase the number of points a player will earn in the Alchemy and Enchantment rooms.
Rooms
The Mage Training Arena offers four rooms for the player to practice casting Alchemy, Enchantment, Telekinetic Grab spells, and Creature Graveyard. In addition to Pizazz points, the player earns coins and runes in the activities. Players must acquire the appropriate number of Pizazz points in each of the four rooms to buy items from the Rewards Guardian.
The teleports to the four rooms are located in the north area of the arena:
- Telekinetic Theatre - south
- Alchemists' Playground - north
- Enchanting Chamber - west
- Creature Graveyard - east
Telekinetic Theatre
In this room, the player uses the Telekinetic Grab spell to move a statue north, south, east, or west through a maze. A maze can take anywhere from 7 to 10 law runes to complete. When the player solves a maze, he or she will get 2 Pizazz points, and the maze guardian will teleport the player to another maze if they wish to do so. After solving five mazes in a row, players will get a bonus of 8 pizazz points, 10 law runes, and 1,000 Magic experience.
If the player logs out, they will be teleported to the main hall and current maze progress will be lost. However, the maze total is recorded as long as the player does not leave the arena. This means that a player should ensure they have done five mazes and received their bonus runes and experience before leaving the arena.
Assuming each and every maze has the same probability to be assigned, then on average 8.3 casts of Telekinetic Grab has to be cast for every maze. This means, that approximately 2780 Magic experience is earned after solving every 5 mazes. This makes every law rune worth 0.57 pizazz points and about 88.25 Magic experience. To compare, casting Camelot teleport will grant only 55.5 Magic experience points.
Alternatively, since maze total is recorded as long as the player does not leave the arena, one may leave the Telekinetic Theatre and re-enter it hoping to get a shorter maze. By completing only mazes that require a minimum of 7 casts to complete, one will earn about 0.72 pizazz points and 100.2 Magic experience per law rune.
Tip: Try to cast the spell near the corners that way you can save time and save some run energy. Don't stand directly at the corner, just near it, also, make sure you're standing directly next to the wall of the maze when you observe the statue to get the aerial view. If you don't stand directly next to it, your view will change every time you move/cast.
Alchemist's Playground
In this room, the player has to use High Level Alchemy or Low Level Alchemy spells to convert items in eight cupboards to gold coins. These items are in the following order (clockwise):
The amount of coins given for each item changes every 42.5 seconds, and the current values are shown in a table in the top-right corner of the screen (in which the values are the same for both High and Low Level Alchemy). The highest amount of coins available for a conversion is 30. Occasionally when the values change, a green arrow will appear next to an item; this means that for the item the arrow is indicating, no nature runes will be required to convert that item, and you still receive. For every 100 coins deposited in the coin deposit box, the player will gain 1 pizazz point. The player also gains 2 Magic experience per coin deposited, and 10 coins (deposited to the player's bank) for every 100 deposited. NOTE: It is recommended that players ONLY deposits coins in multitudes of 100. For example, if you have, say 195 coins, it is a better idea to high alch something worth 5 coins and deposit the coins, rather than wasting 95 coins. It is not possible to deposit 195 coins then another 5 coins to gain 2 points; you will only gain 1 point from the first 195 deposited only.
Strategy: A good way of maximizing pizazz points is by focusing on maximizing the amount of coins received per alch. Therefore, it is recommended to focus solely on obtaining the item that alchs for 30gp each round. In order to find this item quickly, it is important to be aware of the fact that the items appear in the cupboards in the same order each round, making it possible to predict where an item will be based on the location of other items. Most players use the rune longsword and leather boots to aid them in finding other items. Namely, the rune longsword and leather boots will always be on opposite ends of the room because there are three empty cupboards in between them. For example, finding the boots in the north-west corner means the sword will in the south-east corner. This can allow you to quickly find the other items as well according to their relative position to these two items.
Another strategy that seems to work well is ignoring the first wave in order to collect 5 of each item and arranging them in your pack in the order shown in the green box for their value. With the 3 remaining spaces in your pack will be for the coins when alching, the hat, and lastly the nature runes. Following the method should allow you to not use more than 1k nature runes. At the beginning of each wave as the npc says the costs have changed, alchy the 5 of the item that is worth 30 coins. Immediately after which you find that item and replenish your stock and go back to one of the columns closest to that npc. This allows you to get 150 coins each wave. Without wasting runes on lesser valued items or even alchy the wrong item because the value changed mid-alchy. Also you don't have to pay attention to getting the coins in the hundreds as much since every 2 waves your coins add up to 300.
As mentioned, a green arrow indicates the item that can be alched without using up a nature rune in the process. Although players on a budget might prefer to make use of this opportunity to save runes, it is not a recommended strategy for gaining pizazz points. However, one might rationalize alching the 15gp item should it have the green arrow next to it due to the costs saved on nature runes outweighing the relatively small loss in minigame gold gain.
Items are different for everyone in the cupboards. In the playground, the only things that stay the same are item values, and free-cast calls, but the items in the cupboards are random for everyone. When alching, make sure to check cupboards during the alching animation to not waste any time where you could be alching. As the alchemy spells require only fire and nature runes, players are recommended to use a Fire staff and as this will mean both High and Low Level Alchemy will use the same amount of runes. Players are recommended to use High Level Alchemy where possible, as this will give more experience.
- CAUTION: It is highly recommended that you deposit your coins every 1-2k or so, as if you disconnect, you will be put out of the playground, and your coins will be taken away.
Note: The explorers ring free alch cast works in the alchemy room and grants the same amount of experience as a normal low alch cast would.
Enchanting Chamber
(Due to the easy steps that you must follow to earn points in this room, you will receive less Magic experience for casting the spells in the room. Also, you will need to work longer to earn lots of points in this room.)
In this room, the player uses enchanting spells to enchant various shapes located in the 4 corners of the room. At the bottom of the screen is an icon that indicates which shape is to be transformed if the player wishes to gain pizazz points. These shapes will transform into orbs, which can be deposited in the middle of the room, and every 20 will earn you a reward of either 3 blood, death, or cosmic runes. Also dragonstones will spawn around the room (every 7 minutes exactly), which can be enchanted at any level; they give more bonus pizazz points depending on the level of enchantment you used and also turn into orbs. Points gained per dragonstone = 2x enchantment level used; therefore, the maximum points available for enchanting one of the 6 dragonstones is 14 (using Lvl-7 Enchant), it is possible to world hop and keep getting dragonstones, maximizing points gained.
For each ten shapes converted a bonus is awarded. If the tenth shape converted is the current bonus shape, then the arena will award points according to the level of enchantment used to convert the tenth shape.
Fastest Method: The fastest way to gather Enchantment Pizzaz points is to collect the 6 dragonstones that spawn in the room, cast the highest enchantment spell you can on all of them, deposit them, and then immediately quick hop worlds. With the addition of Monkey Madness II, players can now cast Lvl-7 Enchant to yield 14 points per dragonstone, allowing for a new maximum of 84 points per world. Due to the cost, however, it is more economically feasible to cast Lvl-6 Enchant for 12 points per dragonstone, for a total of 72 points per world.
Below are the point values received upon enchanting dragonstones, (points awarded when enchanting a dragonstone depend upon the enchantment level used):
- Level 1 Sapphire enchant = 2 points (level 7 Magic)
- Level 2 Emerald enchant = 4 points (level 27 Magic)
- Level 3 Ruby enchant = 6 points (level 49 Magic)
- Level 4 Diamond enchant = 8 points (level 57 Magic)
- Level 5 Dragonstone enchant = 10 points (level 68 Magic)
- Level 6 Onyx enchant = 12 points (level 87 Magic)
- Level 7 Zenyte enchant = 14 points (level 93 Magic)
Creature Graveyard
In this room, the player has to collect 4 different types of bones from bone piles around the room and use the Bones to Bananas spell to turn them into bananas, which are then deposited in the slots at the side of the room to gain pizazz points. When picked from, the bone piles cycle through each type of bone in order from 1 to 4, giving 4 of each type of bone before advancing to the next type. Every so often, the player will be hit for 2 damage by falling bones, requiring the player to eat some of the bananas to stay alive. For every 16 fruit that you've converted and deposited you gain 1 Graveyard pizazz point. Death will result in a penalty of 10 pizazz points and being sent back to the arena's main hall (you will not lose your equipment). Logging out will not affect your pizazz points (but you will lose all fruit in your inventory).
The Bones to Peaches spell can be used in place of Bones to Bananas, peaches heal 8 Hitpoints whereas bananas heal 2. If you wish to use the Bones to Peaches spell in place of Bones to Bananas, then you can purchase the spell from the rewards guardian who is situated on the arena's upper floor.
If you have or can afford one, a Mud battlestaff can be very helpful as Bones to Bananas will only require one nature rune.
Strategy
The first inventory of gathered bones.
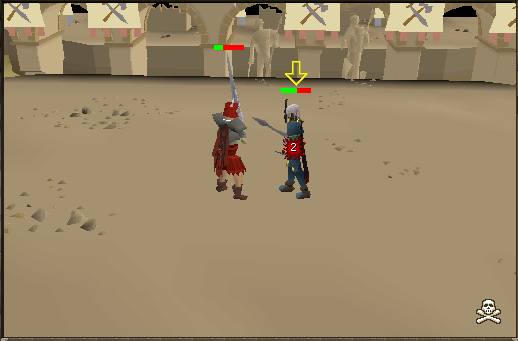
One technique for doing this room involves picking up a specific arrangement of bones and using the Bones to Bananas spell. If you go fast enough using this technique, you'll keep yourself alive while still gaining many pizazz points along the way. When you first arrive at the Creature Graveyard room, move to the west end of the room in front of the deposit slot. On the northern tip of the deposit slot, you'll see a pile of bones very close to the deposit slot. It's advised to use this as a good way to quickly gather Graveyard pizazz points. It's advised to bring a good amount of Nature runes also one Water rune, one Death rune, one Blood rune, and one Earth rune, since they will be given as a reward. Collect 10 bones from a fresh bone pile until your inventory looks similar to the image on the right.
Once you have collected these bones, cast your Bones to Bananas spell. You should end up with 18 bananas. Since the deposit slot only needs 16 bananas to receive a pizazz point, it's advised that you eat 2 of the bananas, then deposit the remaining ones into the deposit slot.
The second inventory for collecting bones.
Head back to the bones pile and collect 6 bones. Your inventory should look something like the image on the right.
Cast your Bones to Bananas spell and you should receive 22 bananas. Again, since the deposit slot only needs 16, you should eat the 6 extra bananas before depositing the remaining ones into the deposit slot.
Repeat this process in a timely fashion should help to avoid death.
Another pattern for drawing bones is (starting at the first 1-fruit bone): 10 bones, 5 bones, 9, 5, 7, 7, 5, then repeat. This yields 18, 18, 16, 16, 16, 18, 19 fruit, minimizing the amount of fruit that do not count for points.
Other Survival strategies
Players who do not wish to eat in the room and thereby save nature runes may exit the room when they are low on life points and heal from one of the nurses or surgeons at the Al-Kharid Duel Arena hospital. Then they may return to the graveyard, fully healed and ready to go again.
Another option is to bring a small amount of high-healing food (lobsters, monkfish, and so on) into the graveyard and eat when needed. Expect to eat about 1 monkfish per minute if this method is employed.
A Regen bracelet is useful, especially in conjunction with a Hitpoints cape. However the damage you sustain outweighs the speed at which you gain hitpoints, so you will need to bring a supplementary method of healing.
Players can also teleport to Clan Wars via the ring of dueling and enter the Clan wars FFA portal to restore any stats. Players can then use the ring of dueling to return to the duel arena and run back to the Mage Training Arena.
Rewards
A player can buy runes, infinity robes, wands, a mage's book, and the Bones to Peaches spell in the shop upstairs with the Pizazz points they've earned. If a player is having trouble with the arena, an arena book may also be bought for 200 coins.
Please note that the prices listed for the items Apprentice wand, Teacher wand and Master wand are all upgrades, and require the player to have both the points required to purchase, and the previous state of the wand (e.g. To purchase a Master Wand requires the player to first own a Teacher Wand as well as the points displayed in the table below). This effectively gives the Master Wand the price of 480 Telekinetic, 530 Alchemist, 4800 Enchantment and 480 Graveyard Pizzaz Points.
| Item | Telekinetic | Alchemist | Enchantment | Graveyard | |
|---|---|---|---|---|---|
| Infinity gloves | 175 | 225 | 1500 | 175 | |
| Infinity hat | 350 | 400 | 3000 | 350 | |
| Infinity top | 400 | 450 | 4000 | 400 | |
| Infinity bottoms | 450 | 500 | 5000 | 450 | |
| Infinity boots | 120 | 120 | 1200 | 120 | |
| TOTAL | Telekinetic | Alchemist | Enchantment | Graveyard | |
| 1495 | 1695 | 14700 | 1495 | ||
| Item | Telekinetic | Alchemist | Enchantment | Graveyard | |
| Beginner wand | 30 | 30 | 300 | 30 | |
| Apprentice wand (Upgrade) | 60 | 60 | 600 | 60 | |
| Teacher wand (Upgrade) | 150 | 200 | 1500 | 150 | |
| Master wand (Upgrade) | 240 | 240 | 2400 | 240 | |
| Mage's book | 500 | 550 | 6000 | 500 | |
| Bones to Peaches spell | 200 | 300 | 2000 | 200 | |
| GRAND TOTAL | Telekinetic | Alchemist | Enchantment | Graveyard | |
| 2675 | 3075 | 27500 | 2675 | ||
| Item | Telekinetic | Alchemist | Enchantment | Graveyard | |
| Mist rune | 1 | 1 | 15 | 1 | |
| Dust rune | 1 | 1 | 15 | 1 | |
| Mud rune | 1 | 1 | 15 | 1 | |
| Smoke rune | 1 | 1 | 15 | 1 | |
| Steam rune | 1 | 1 | 15 | 1 | |
| Lava rune | 1 | 1 | 15 | 1 | |
| Cosmic rune | 0 | 0 | 5 | 0 | |
| Chaos rune | 0 | 1 | 5 | 1 | |
| Nature rune | 0 | 1 | 0 | 1 | |
| Death rune | 2 | 1 | 20 | 1 | |
| Law rune | 2 | 0 | 0 | 0 | |
| Soul rune | 2 | 2 | 25 | 2 | |
| Blood rune | 2 | 2 | 25 | 2 | |
Note
There is a maximum number of points you can have at a time:
- Telekinetic pizazz points - 4,000 points
- Enchantment pizazz points - 16,000 points
- Alchemist pizazz points - 8,000 points
- Graveyard pizazz points - 4,000 points
| Team games |
Barbarian Assault • Blast Furnace • Burthorpe Games Room • Castle Wars • Fishing Trawler • Nightmare Zone • Pest Control • Shades of Mort'ton • Trouble Brewing • Volcanic Mine |
| Solo games |
Barrows • Blast mine • Brimhaven Agility Arena • Champions' Challenge • Gnome Ball • Gnome Restaurant • Impetuous Impulses • Inferno • Mage Arena • Mage Training Arena • Pyramid Plunder • Ranging Guild Activities • Rat Pits • Rogue Trader • Rogues' Den • Sorceress's Garden • Tai Bwo Wannai Cleanup • Tears of Guthix • Temple Trekking • Tithe Farm • Treasure Trails • TzHaar Fight Cave |
| PvP games |
Bounty Hunter • Castle Wars • Clan Wars • Duel Arena • Last Man Standing • TzHaar Fight Pit |