Template:RSW
Details
| Start point | |
| Official difficulty | Master |
| Description | The King of the northern Gnomes, Narnode Shareen, is once again in need of your help. He recently decided to send an envoy of his Royal Guard, the 10th squad, to oversee the decommissioning of the Gnome owned ship-building facilities on the eastern coast of Karamja.
It has been quite some time since the 10th squad were dispatched and they have been deemed missing in action. It will be up to you, should you decide to help, to find out what fate befell the 10th squad and if possible, track them down. If only it were so simple. Sinister forces have begun to spread through the Gnome hierarchy and threaten to unleash an unknown terror upon the world. Far across the land, the fires of vengeance are being stoked once again. Can you unravel the mystery behind the deception? Can you separate the truth from the lies? Can you decide for yourself what is real and what is not? |
| Length | Very Long |
| Requirements |
|
| Items required |
Recommended:
It's recommended to have a Prayer level of 43. |
| Enemies to defeat | Jungle Demon (level 195) |
Walkthrough
WARNING: Ape Atoll is one of the most dangerous areas in the game; until obtaining a monkey greegree, proceed the area with caution. Bring plenty of food, antipoisons, and an emergency teleport, during your stay on Ape Atoll, in addition to other required items. Switching off auto retaliate and utilizing protection prayers will greatly improve your chances of survival.
This quest is divided into 4 chapters.
Chapter 1
Items required: 3 free inventory space, and protective gear for while on Ape Atoll.
- "In which our hero finds themselves drawn back into Glough's web of deception and deceit."
- Talk to King Narnode. He will tell you to investigate Glough's old shipyard for any trace of the missing 10th squad and will give you the Gnome royal seal.
- Ascend the tree and take the glider to Karamja (Gandius). If you do not have monkey bones (or a monkey corpse), there are nearby monkeys to procure some from.
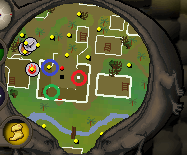
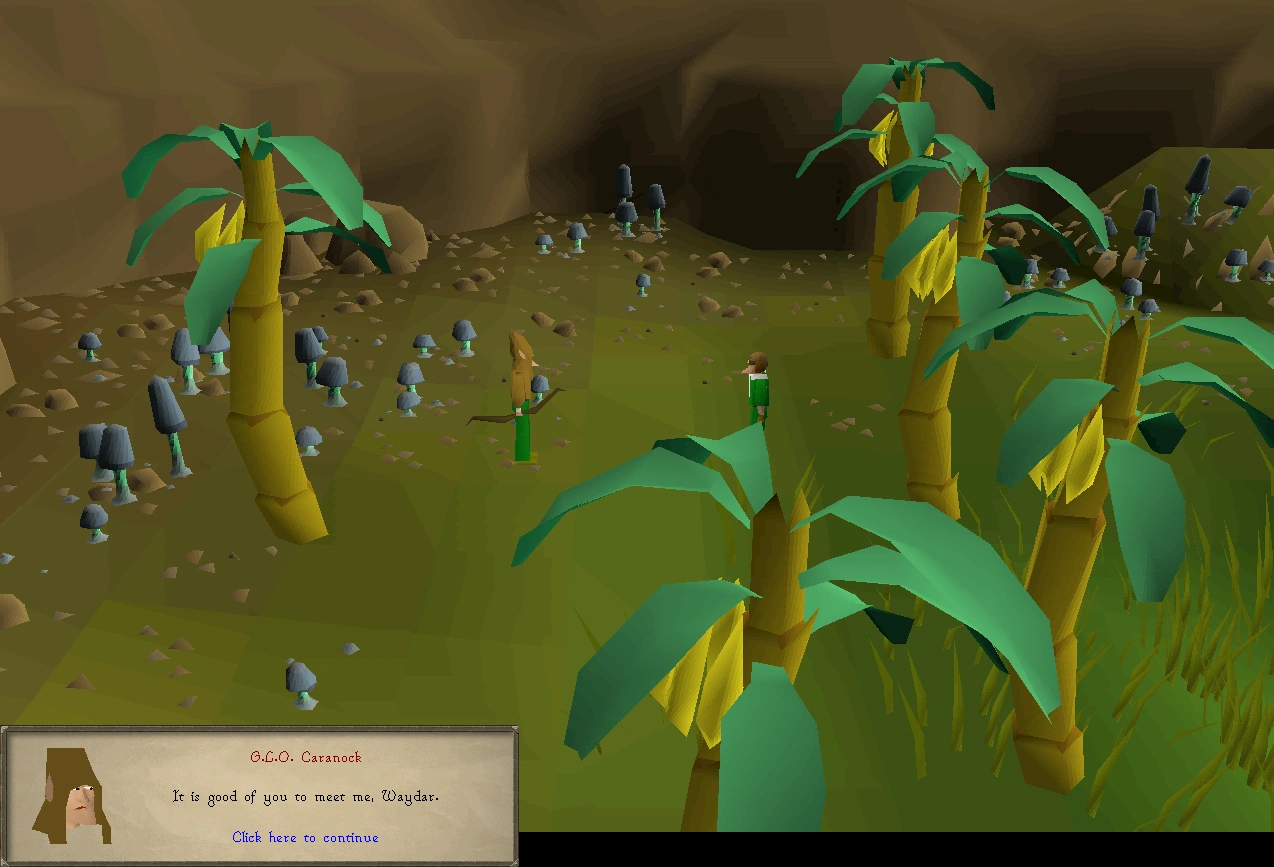
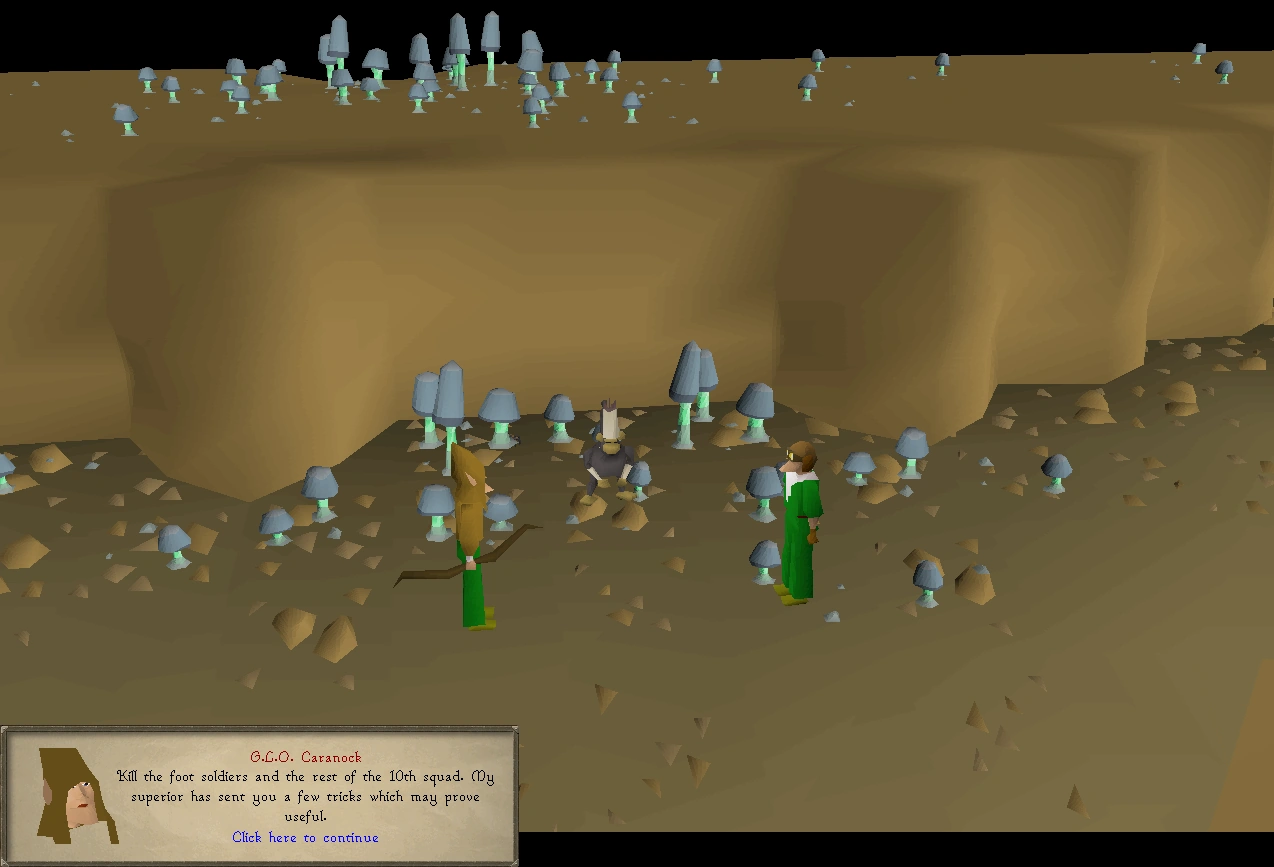
- From the glider, head due north to the shipyard and talk with G.L.O. Caranock, a gnome who is located in the building in the southern area of the shipyard, by the fence. He will act very suspiciously and advises you to return to the King.
- Reconvene with the King via glider. He will give you Narnode's orders and tell you to speak to Daero. There is a bank within the Grand Tree on the 1st floor. Use this time to bring some food, antipoisons, and any other items you're going to need to survive Ape Atoll (see above).
- Talk to Daero, the new head tree guardian, on the 1st floor[?] of the Grand Tree, near Blurberry Bar. Go through all the chat options and then tell him you're prepared to leave. He will blindfold you and take you to an underground hanger. Talk to Daero again who will introduce you to Waydar. Then you will have to solve an "Reinitialization" puzzle. Do this by clicking on the panel to the southeast. Players can take some spare controls from the nearby crate to view the solution.
- Solve the sliding puzzle, or alternately, you can bribe Glough with 200,000 coins to have him solve it for you. Glough still resides where he did during the Grand Tree quest. If you pay Glough, go to the puzzle again and slide one piece.
- Talk to Daero, then Waydar. The two of you will make landing on Crash Island, where the 10th Squad crash landed.
- With your Gnome royal seal in your inventory, ask Lumdo to sail to Ape Atoll. As he has conflicting orders from his sergeant, Garkor, he will refuse to take you. Talk to Waydar (watch out for poisonous scorpions just to his left). Speak with Lumdo again and he will now agree to take you to Ape Atoll.

Chapter 2
- "In which our hero finds themselves engaging in severe quantities of monkey business."
- Note: There is no necessary combat until Chapter 4: "The Final Battle."
Part 1
- Items required: High healing Food, 1-3 antipoisons
At any point, you can teleport or flee from of Ape Atoll to restock items. All native creatures of Ape Atoll will be aggressive regardless of your combat level as long as you are in human form.
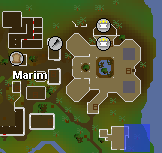
- Once on the Atoll, start going northwest until you reach a mahogany tree, at which point you should run north. Aggressive level 24 snakes, level 38 scorpions, and level 42 jungle spiders, all of which are poisonous, will attack if you are within their vicinity. Activate protect from missiles as you travel north, as a volley of poisoned arrows will start pelting you as reach close to the Ape Atoll gate. You will be knocked out and placed into prison.
- You awake in a cell guarded by Trefaji and Aberab. Speak to Lumo, one of the captured 10th Squad members. Stay away from the cell door if the guards are in front of it, or else they will punch you for some damage. The guard will patrol twice throughout the prison, then leave to rotate shifts. As the guard moves away from your cell door, pick lock the door until you succeed. Once out, as the guard is walking out to switch, walk behind him reach to the exit. Note that this may take several tries.


The layout of the jail.
- Travel north of the jail, then east to find Karam, a member of the 10th squad in the bushes.
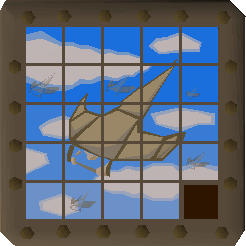
- Travel south, past the large door, keeping in the jungle grass. When you are in the grass, the monkey archers do not fire, but activate protect from missiles as a precaution. Continue east in the grass south of the building, then south, until you reach Garkor, the Sergeant of the 10th squad.
Garkor's Location is shown in blue.
- Speak with Garkor. Make sure to get all the way through the dialogue to the point where he tells you to go meet Zooknock.
- Go north, then sprint west to the grass with protect from missiles on. Continue west behind the buildings in the grass until you reach the bamboo door.
The location of the hut.
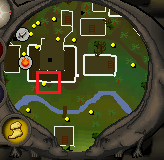
- Enter the door. When inside this house, stay on the dark brown ground or you may be sent back to jail.
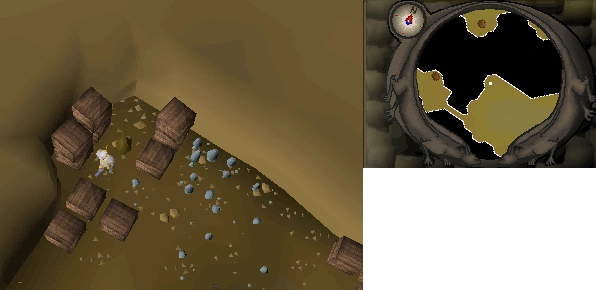
- Staying on the dark brown, step east and north, and search the stacked crates towards the middle of the room to acquire monkey dentures. Don't let the sleeping monkey guard wake up and catch you, or else it will summon guards to arrest you. If you need emergency food, there is a crate of bananas in the southwest that you can take from for healing.

Red: Dentures crate Green: Banana crate Blue: Sleeping guard monkey
- Search the south-eastern most crate and where a prompt appears. You will take damage if you drop down into the cavern below, so heal up if necessary before entering. Your agility level also has a chance to negate this damage.
- Travel to the northwest part of this cavern, and search the crates to acquire the M'amulet mould

The location of the M'amulet moulds.
- If you need to resupply, you can exit the city by going to the southeast corner of the city. Run past the guards and the gravedigger to a ladder. Go up, jump off the bridge, and go back to the boat to Crash Island. You could also teleport out.
Part 2
Items required: 1-2 Antipoison potions, monkey dentures, m'amulet mould, gold bar, 4+ energy potions, and food, a plank (recommended, obtainable during quest).
Note: You are suggested to bank after Part 2.
- Bank if necessary.
- Go to the Grand Tree.
- Climb up the ladder and speak with Daero.
- Tell Daero that you wish to return.
- Speak to Waydar.
- Speak to Lumdo.
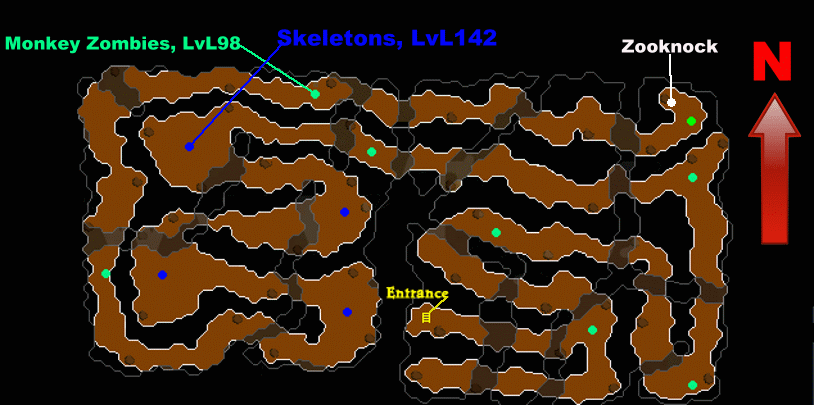
- Travel west and enter the tunnel (). (A plank can be obtained in a run-down shack further west on the island)

- Once within the dungeon, it is suggested to activate protect from melee make your way toward the north passage. Maintain a moderate amount of health and run energy due to the presence of floor traps. Use the plank on the claw traps to avoid getting hit for a large amount of damage. You can also run past (without stopping) to avoid activating the claw traps. Level 1 spiders are ubiquitous within this area, along with level 98 monkey zombies and level 142 skeletons.
- At the end you will find Zooknock, Waymottin and Bunkwicket; talk to Zooknock then use your M'amulet mould, gold bar, and monkey dentures on him. Make sure you are given an Enchanted bar before leaving the tunnel (you may have to talk to Zooknock again).
Part 3
Items required: 1-2 Antipoison potions, enchanted bar, m'amulet mould, ball of wool, and food. If you are going to do Recipe for Disaster, bring ranged equipment to kill a Monkey Guard for a Gorilla Greegree later.
- Teleport, and bank if necessary.
- Return to Ape Atoll, and continue northwest until you are placed in the jail cell again.
- Escape the cell as before.
- Travel east towards the temple door.
- Now you must descend down through the trapdoor to the east in the temple. Activate protect from melee to negate attacks from the powerful monkey guards. If you do not, you should wait until the guards walk away. Hide in the northeast corner of the temple until there is enough room which you are able to descend. Be careful not to get surrounded or cornered by the monkey guards or else you may be unable to escape. You can also restore prayer points if needed at the monkey altar.

The trapdoor is directly next to the ladder.
- Ignore the monkey zombies, and swiftly use the enchanted bar on the wall of flames.
- Travel back up the ladder or find a safe spot to get away from the foes. Teleport away from Ape Atoll if you need to replenish supplies.
- Use the ball of wool with the amulet.
- After you have created the m'speak amulet you can either teleport out to resupply or continue on to the next step. Be careful! You will most likely be trapped again when you ascend the ladder, so be sure to activate protect from melee if you haven't already done so.
- Head to the building west of the jail (make sure you either sneak around in the grass, or use Protect from Ranged to run directly there.) To the west of that building, there should be a banana garden that has a Monkey Child in it. The Monkey Child is being patrolled by The Monkey's Aunt. She follows a predetermined path that loops around the wooden house by the garden. Do not enter the banana garden when the monkey's aunt is present or she will call for guards to arrest you. Wait for the aunt to walk away, then speak to the Monkey Child.
- Tell the monkey child that you are his uncle.
- After he reveals that he is supposed to collect 20 bananas, search and pick 5 from the nearby trees. You do not actually need 20.
Wait for a few moments in the corridor, then return to the monkey child when the aunt is away. Ask the child to borrow his Monkey talisman. If you lose the monkey talisman, you may receive it from him again. If he cries, simply wait or log out to stop his crying. Note: For the Recipe for Disaster quest, you should get a total of 4 talismans. Read below for info regarding the monkey bones you should gather for the quest.
Recipe for Disaster: You will also need the an additional 3 greegrees (4 total). Each of these requires 1 talisman for a total of 4 talismans plus their respective monkey bones: You will save yourself 1-2 trips if you get all of these before going to Zooknock at this point. For all of the bones, you must kill 1 of each of the following: Monkey (monster), Monkey Guard, Monkey Archer, Monkey Zombie. Once you have all of the required bones and talismans, take all 4 bones and 4 talismans to Zooknock and to create them. If he does not take the next bones you give him right after he gives you your greegree, talk to him (to ask him to make another greegree) and/or try the drop trick with your greegree(s).
- Exit Ape Atoll.
Part 4
Items required: Monkey bones (make sure those are karamjan monkey's bones, otherwise you will have to run back again) , 1-2 Antipoison potions, monkey talisman, 4+ energy potions, Prayer Potion and food, a plank (recommended), Ardougne teleport.
- Bank for the necessary items and make sure you have a teleport again.
- Return to Ape Atoll.
- Travel through the tunnel for a second time, and give the monkey talisman and the monkey bones to Zooknock. Then, after you receive the monkey greegree, teleport to Ardougne.

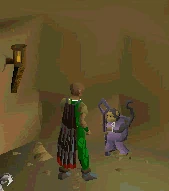
G.L.O. Caranock and Waydar having a conversation.
Chapter 3
Items required: Monkey greegree, m'speak amulet.
- "In which our hero finds themselves contending with life as a monkey."
- Enter the Ardougne Zoo.
- Wield the greegree.
- Speak to the Monkey Minder who will place you in the cage.
- Speak with a monkey (the only one with a "Talk" option) to take it into the inventory.
- Unequip the greegree and speak to the Monkey Minder again. He will let you escape.
- Travel by foot to the Gnome Stronghold, and climb up to the 1st Floor and talk to Daero, and travel to Ape Atoll as usual. Any method of teleportation (including random events) will result in the monkey leaving your inventory. Your new monkey friend will supply you with some "humorous" dialogue, and examining him will get you poked. If you have any bananas in your inventory, he will most likely eat them. There is also a rare chance that he will give you a clue scroll (medium) if you use bananas on him directly.
- Return to Ape Atoll. Do not forget to equip the greegree.
- Wield the monkey greegree (Karamjan only, the others will not work!) to become a monkey! In this form, you will not be approached or attacked by any NPCs.
- Travel northwest as usual, but this time you pass through the gate unharmed.
- Travel all the way east and talk to the sergeant (Garkor) again.
- Then speak with an Elder Guard near Garkor. He sends you to Kruk .
- Travel all the way to the west shore, then head south. Travel up the cliff, up the ladder, across the bridge, and down the other ladder.
- Speak to Kruk. He will take you back to King Awowogei.
- Speak with King Awowogei and ask for allegiance. He asks for you to rescue a monkey from the Ardougne zoo.
- Speak to the king again and the monkey will automatically leave your backpack. Awowogei will consider alliance.
- Exit the king's chamber.

Caranock, Waydar and King Awowogei plotting.
Chapter 4
Items required: 1-2 Antipoison potions, food and combat equipment.
- "The Final Battle"
- Note: You can teleport to the Jungle Demon fight from anywhere by simply equipping the 10th squad sigil.
- Enter the grass near Garkor.
- Speak to Garkor(as a human or monkey). He will give you a 10th squad sigil, but do not equip it yet. If you lose your last sigil, you must speak with Garkor again, who will send you to Waymottin at the end of Zooknock's tunnel.
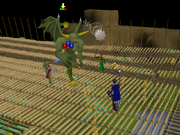
The 10th squad and the player fight the demon.
- Bank in preparation for the Jungle Demon fight. Ensure you have full prayer points and health. The Jungle Demon is best defeated by using a Dwarf Multicannon, by ranging, or by luring the demon into the 10th squad gnomes. To determine your strategy, choose whichever of the three suggested methods would work best for your skill. Bring about 3 prayer potions, good food (lobsters or better), and a one-click teleport out just in case. Protect from Magic is crucial, and should ideally be turned on just before you teleport.
Bonzara teleports a player.
- There is a safe spot in the arena across a bridge on the outside edge. From there, you can either range him, or lure him into the 10th squad gnomes, who can weaken him, but you must hit the final blow yourself. Using ring of recoil will help, specially when he hits hard. When the Jungle Demon reaches 1 HP there will be a period of a few seconds before it regenerates its health. You can use melee with this method.
- When you are ready to fight, wear the sigil. You will be teleported to the Jungle Demon's arena shortly thereafter.
- Attacking with Magic or Ranged as well as having 37+ Prayer is recommended. If you are using either Magic or Ranged coupled with Protect from Magic, standing still once you are teleported to the arena will keep distance between you and the Jungle Demon and prevent it from approaching you and using its melee attack, which will result in you taking no damage throughout the fight as long as you keep your prayer up.
- Once it is slain, speak to Garkor, who is indicated by an arrow. He will tell you to speak to Zooknock to be teleported out. Speak to Zooknock to be teleported to Ape Atoll. (Warning: You will be teleported to an area that potentially will result in you being attacked by poisonous NPCs.) If players decline the offer and stay, they are free to explore the banana plantation. However, Zooknock leaves, meaning that the other gnomes are the player's teleport out. In the base of the statue is a crack which players can enter and speak to Bonzara. He offers to teleport the player out of the arena at the end of the conversation. However, the teleport puts players in the jungle on Ape Atoll, so be sure to have the anti-poison recommended previously.
- Escape the island however you like, either through the main gates as a monkey, with any form of teleport, or by jumping off the bridge in the southeast part of the city. Go to the boat, back to Crash Island, then to the Gnome Stronghold.
- WARNING FOR PURES: This step and completing the quest will result in you no longer being able to return to Ape Atoll without claiming the exp and getting (at least) 33 Defence. Do not finish the quest before training on skeletons with Chinchompas if you intend to make use of the training location in the future.
- Speak with King Narnode in the Grand Tree to finish the quest.
- Chat with Daero to get the experience reward afterwards.

Rewards
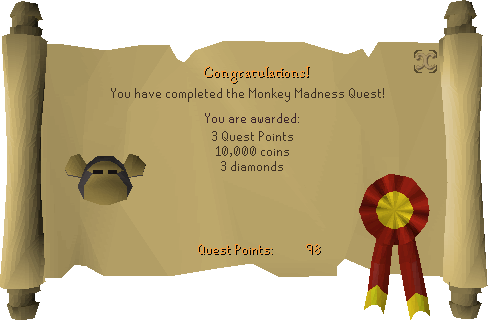
- 3 Quest points
- 10,000 coins
- 3 diamonds
- Gain 35,000 experience in Attack and Defence, or Strength and Hitpoints, and then 20,000 experience in the other option, by speaking to Daero. Note for pures: You cannot go back to the bunker without speaking to Daero and gaining defence xp; you can not go back to Ape Atoll.
- Able to buy and wield the Dragon scimitar.
- The ability to turn into a monkey, in Ape Atoll & Ardougne zoo, using the Monkey greegree.
- Full access to Ape Atoll.
Required for completing
Completion of Monkey Madness is required for the following:
- Completion of Recipe for Disaster
- Monkey Madness II
Trivia
- If you talk to Zeke, the scimitar seller of Al Kharid, and ask him for a Dragon scimitar, he will respond, "The banana-brained nitwits who make them would never sell any to me. Seriously, you'll be a monkey's uncle before you hold a Dragon Scimitar." Obviously this is a reference to this quest.
- If you have started Fairytale II - Cure a Queen you can use a new Fairy ring location on Ape Atoll. Using this fairy ring requires completion of Daero's training. In order to leave the small area where the fairy ring is located you will need a ninja greegree and 48 Agility to continue through the remainder of the agility course.
- If you tell Zooknock you lost the amulet you will have to get the materials to create a new one.
- If you wear a M'speak Amulet and listen to the enchanted bar, it says "I'm stuck in this horrible gold bar!"