Details
| Start point | |
| Official difficulty | Experienced |
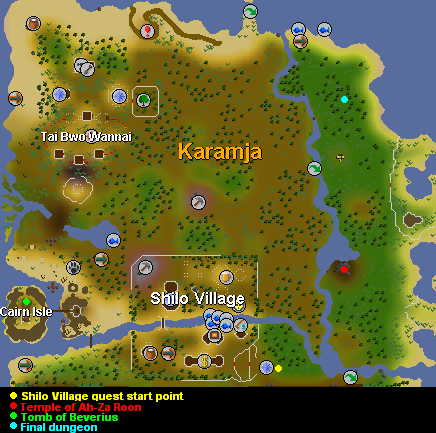
| Description | New areas in the Southern part of Karamja Island have been discovered with a mysterious village.
Who knows what hidden treasures exist, and what dangers lurk to guard them? |
| Length | Long |
| Requirements | Completion of Jungle Potion
Must be able to defend from many Undead Ones (level 61-73) and able to defeat three monsters that are about level 90. |
| Items required |
Recommended:
|
| Enemies to defeat | Nazastarool in 3 forms, levels 91, 68 and 93. Safespotting is possible. |
Walkthrough
Beginning the quest
Start by talking to Mosol Rei at the entrance to Shilo Village. Warning: If you ask, "What danger is there around here?", you will be attacked by a couple of undead ones. A quick way of getting there is using the gnome glider to Karamja (aka Gandius) then crossing the stepping stones towards the south-west (30 Agility required, but you can still cross by falling off; you'll automatically swim to the other side), or you could use Fairy Ring code CKR and run south across the bridge, then east on the path behind Shilo Village.
Select the following five options:
- "Why do I need to run?" (Option 1)
- "Rashiliyia? Who is she?" (Option 1)
- "What can we do?" (Option 1)
- "I'll go to see the Shaman" (Option 4)
- "Yes, I'm sure and I'll take the Wampum belt to Trufitus." (Option 2)
Mosol Rei should give you a wampum belt to take to Trufitus (start of Jungle Potion) who is in the house north-east of Tai Bwo Wannai. Use the wampum belt on Trufitus, and he will tell you that things look very bleak. Ask him about a legend and the temple, and tell him to tell you more. He will have almost no hope of anyone finding the temple of Ah Za Rhoon. You must state that you will look for the temple, and once you affirm your intent to search, Trufitus will take the wampum belt from you, and this quest will turn yellow in your Quest Journal.
- Note: All items except good food, armour, teleports, and the bones can be purchased at Jiminua's Jungle Store en route to visiting Trufitus.
Ah Za Rhoon
Items needed: Spade, torch or candle, tinderbox, rope, chisel.
- Note: You may want to bring decent defensive armour or Prayer potions to defend against the undead ones.
To get to the temple from Tai Bwo Wannai, go east to the river, cross the log near the crashed glider, and go south along the river until you reach a mound of earth surrounded by rocks. A quick way to get there is to teleport to the Duel Arena using a ring of duelling and take the glider to Gandius.

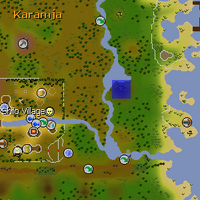
Location of Ah Za Rhoon
Use your spade on it to find a fissure. Light your torch or candle with the tinderbox, and then use it on the fissure to light it up. (The candle will drop down, and you will be unable to retrieve it.) Add a rope to the fissure, securing it to the lip. Search the fissure and climb down into the dungeon below (requiring 32 Agility).
You will be under attack from undead ones (level 61 - 73), but it is not multicombat area. If you kill them, sometimes a cloud of poison gas will be released and hit you for damage.
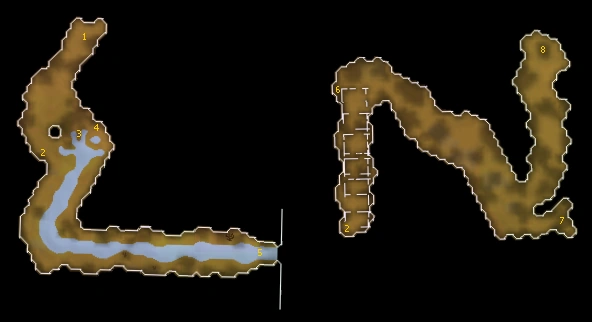
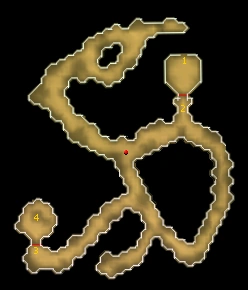
In this cave system, you will need to find four items.
- Stone-plaque: There is a strange-looking stone (4 on the map) on the other side of the pool, east of the smashed table. Use a chisel on the stone to obtain the Stone-plaque.
Follow the cave until you reach a pool of water with a smashed table. South-west of the table is a 'cave in' area. Search it to crawl through to the next cave.
- Tattered scroll: Head north until you reach the end of the ruins. To the west, near the wall there will be some loose rocks (6 on the map). Search them. If you fail, you will get hit upwards of 7 points.
- Crumpled scroll: Follow the cave around the bend, and head south-east until you come to a small dead-end branch. Search the sacks next to a smashed table (7 on the map).
- Zadimus corpse: Head north to the far end of the cavern, where you find the old gallows (8 on the map). Search them and remove the corpse body. If you have all 4 items, from here you can simply teleport out.
|
|
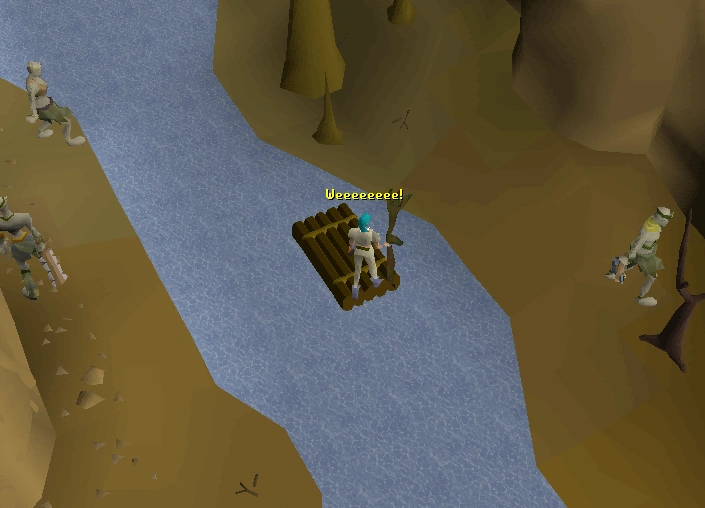

Taking the boat out of Ah Za Rhoon.
To exit the dungeon, you can craft the smashed table into a raft and use it to leave. This does not always work; it is possible to get the message that there isn't enough wood left. In this case, you will have to leave by other means. If you want, you can continue south, then east to the end of the cave. Search the rocks you find there to leave via the waterfall. If you fall leaving this way, however, you can take a lot of damage. You will find yourself near the stepping stones to the east of Shilo Village.
Scrolls from Ah Za Rhoon and the Proper Burial
Read both the scrolls and the plaque. Then, use both scrolls, the plaque, and the corpse on Trufitus. Then, go to the tribal statue west of Trufitus' hut, and bury the Zadimus corpse to make the Spirit of Zadimus appear. He will give you a bone shard. Take the bone shard back to Trufitus, and he'll tell you to look for Bervirius' tomb.
- Note: Be sure to read the scrolls and the plaque, or he won't tell you about Bervirius' tomb! Also, don't worry about the quest guide not updating too much. Once you've got all the items, you should be fine to go to Bervirius' tomb.
Tomb of Bervirius
You now need to go to the Tomb of Bervirius. From Tai Bwo Wannai, go south towards Cairn Isle, climb the rocks and cross the bridge to reach Cairn Isle (just below the Graahk hunting area). You can fall and take damage especially with low Agility. Note that walking over the bridge with high Agility has a higher success rate. Once you're at the other side, search the well-stacked rocks on the north side of the island, and enter the crawl-way (32 Agility needed). You may become stuck many times, but keep trying. Head south to the dolmen, and search it to get a sword pommel, a locating crystal (you take 10 damage if you drop it) and Bervirius notes (if you lose these items, you will need charcoal and papyrus to get to Bervirius notes again). Exit the cave by climbing the rock slide (2).
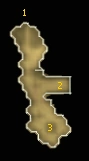
|
|
|
Read the scrolls. You now need to make a new necklace. Use a chisel on the sword pommel to make bone beads. If you don't already have bronze wire, use your bronze bar on an anvil (there is one north-west of Trufitus), and choose to make bronze wire. Use this on the beads to make the beads of the dead necklace. You're now ready to take on the final boss.
- Note: DO NOT drop the sword pommel or the bone beads (made from the sword pommel) by accident. It will turn to dust, and you will have to go get it again.
Tomb of Rashiliyia

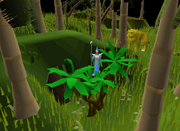
The hidden doors to the Tomb of Rashiliyia.
Items needed: Chisel, bone shard, beads of the dead necklace, locating crystal, food, weapon, armour, 3 regular bones OR kill things to get bones in the dungeon. It is advisable to bring bones and have an emergency teleport if your character is low level. You can kill chickens in Tai Bwo Wannai Village to get regular bones if you need some.
- Tip: If you have access to the Fairy Ring network, you can use the Karambwan fishing spot fairy ring to travel just north of the Tomb of Rashiliyia entrance (DKP).
Head east to the river and cross the log near the crashed glider. Rashiliyia's Tomb is north of the crashed gnome glider, a bit south from the coast. You might run into The Shaikahan (level 83), who you cannot damage with regular weapons. East of the Shaikahan, look for a searchable palm tree. It should be noted that the entrance is hidden behind a hill and is most visible if you are facing south. Search the palm trees to find two doors. Search these doors to find the shape of the keyhole, and then use your chisel on the bone shard to make a bone key, put on the beads of the dead necklace, and use the key on the door to enter.
|
|
You'll find undead ones all throughout the dungeon in a multicombat area - more will be summoned if you pick up the coins, which turn to dust.
Nazastarool
Running past the undead, go through the ancient gates (while wearing the beads of the dead necklace) and down the rock slope (hard to get back up), head west, then south, then south-west until you find some doors. Note: Other sets of dummy doors exist if you take a wrong turn. Use three regular bones on these doors. Enter and keep the beads on and search the dolmen.
Lure Nazastarool to the northern part of the dolmen to safespot him.
You will be attacked by Nazastarool, a level 91 zombie. He uses Melee throughout the battle. You can safespot all three forms on either the northern or southern side of the dolmen. After you defeat him, he will turn into a level 68 skeleton. After you defeat him, he'll turn into a level 93 ghost. Once you have defeated the ghost, you will get the corpse of Rashiliyia. If you die when you are fighting, you will have to fight only those you did not defeat again, not all three forms!
- Tip: Between forms, a dialogue comes in the conversation window. In extremis, perform some other action, like burying the spare bones you brought, or inspecting your quest log, and the next incarnation will not immediately appear, giving you time to heal, leave, etc.
- Note: A bug sometimes allows you to summon a second ghost while fighting the first, which is not a good idea. You get two corpses but only one in your inventory.
The three forms of Nazastarool.
To leave, simply return to where you entered—remember to use your key on the door to exit. On the way, ignore the coins left there because if you pick it up, a bunch of undead ones will attack you, as they seem to despise greed. If you attempt to open the doors to exit the cave without using your key on the door, your character will say:
- "Oh no, I'm going to be stuck in here forever!
- How will I ever get out!
- I'm too young to die!"
Rashiliyia's corpse
Now, you need to find a proper burial place for Rashiliyia's remains. The clue to this location can be found in the tattered scroll that was found in Ah Za Rhoon: "a tomb that is surrounded by and level with the sea. The only remedy for containing the spirits of witches and the undead." Go back to the Tomb of Bervirius on Cairn Isle west from Shilo Village, and use the corpse on the dolmen. Rashiliyia will thank you for letting her rest in peace and will give you your reward.
- Tip: If you have access to the Fairy Ring network, you can simply use the Fairy Ring code north of the exit of the Tomb of Rashiliyia, and teleport from there to Cairn Isle (CKR).
Reward
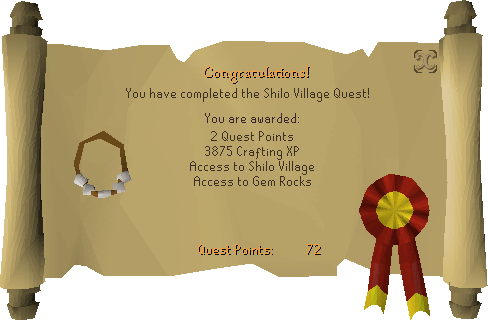
- 2 Quest points
- 3,875
 Crafting experience
 - Access to Shilo Village
- Ability to quick travel to Shilo Village using the cart near the Brimhaven docks
After completing the quest, every item you got during the quest can be sold to Yanni Salika in Shilo Village for 2,000 coins total.
Required for completing
Completion of Shilo Village is required for the following: