The TzHaar Fight Cave is an advanced area in RuneScape introduced in October 2005. It is a combat minigame in the Karamja volcano. Up until this update, the Kalphite Queen had been the most powerful of all creatures within RuneScape. However, the introduction of the TzHaar Fight Cave created 2 monsters, the level-702 TzTok-Jad and the level-360 Ket-Zek, both of which are higher in level. However, the Kalphite Queen is widely regarded to be more difficult to defeat than the level-360 Ket-Zek, despite its lower combat level.
Location
Deep under the ground of Karamja, a new species of creature has been discovered. This was introduced in early October 2005. To find the entrance to this underground city, or TzHaar, players must go into the volcano dungeon on Karamja. Once there, players will see a cave, which leads to TzHaar.
Monsters
The residents here are much stronger than most places, which is to be expected from a race living inside a volcano, and have devised many tests of skill and strength. Some, like the TzHaar Fight Pit, are meant as tournaments between bold adventurers. However, the TzHaar Fight Cave pits adventurers against a succession of monsters, each harder than the last. The final boss is the immensely powerful level-702 TzTok-Jad, but to get to him, players must battle past six other types of monsters ranging from level 22 up to level 360.
The monsters are in order of appearance:
| Lvl | Image | Name | HP | Attack | Hits | Notes |
|---|---|---|---|---|---|---|
| 22 | 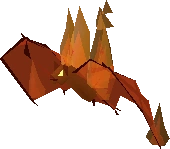 |
Tz-Kih | 10 | Melee | 4 | Drains Prayer while Melee'ing; use Ranged and hit-and-run tactic to kill. |
| 45 | 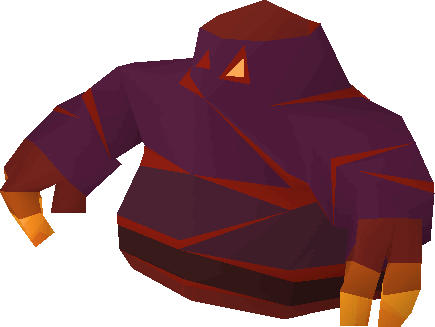 |
Tz-Kek | 20 | Melee | 7 | Recoil damage of 1. |
| 22 | 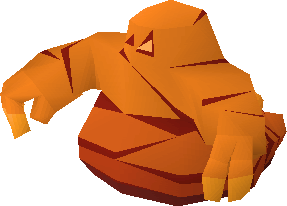 |
Tz-Kek | 10 | Melee | 4 | 2 appear after a 45 is killed. |
| 90 | 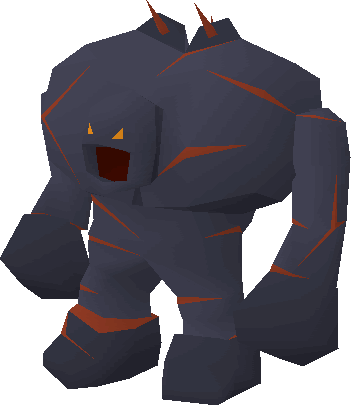 |
Tok-Xil | 40 | Ranged, Melee | 13 | See the wave breakdown for when to use Prayer. |
| 180 | 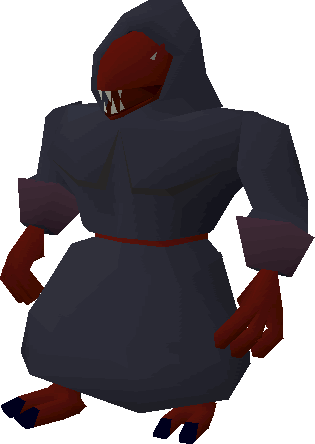 |
Yt-MejKot | 90 | Melee | 25 | Can heal itself and other monsters. |
| 360 | 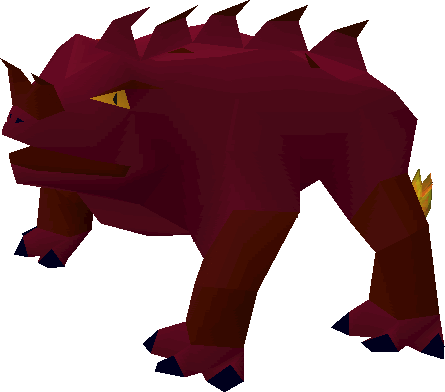 |
Ket-Zek | 180 | Magic, Melee | 50s | Range with Protect from Magic on, and stay out of its Melee range. |
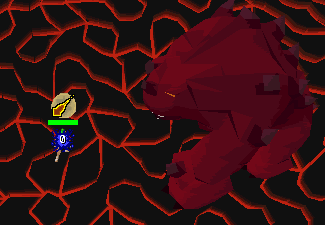
| 702 |  |
TzTok-Jad | 255 | Magic, Ranged, Melee | 97 | See text. |
| 108 | 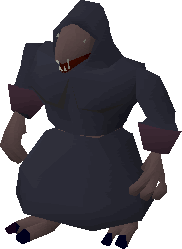 |
Yt-HurKot | 60 | Melee | 14 |
Appears when Jad falls below half HP and will heal Jad if: A. They are in melee distance of Jad and not interrupted. B. They are in combat at any time, regardless of distance from Jad. See the Monsters Wiki Page for techniques. |
The goal of the Fight Cave is to reach and defeat the level-702 TzTok-Jad, but that is extremely difficult to do, and is impossible for all but the most versed in combat tactics. Unlike the Kalphite Queen, players cannot team up against these monsters.
TzTok-Jad
Jad slams his feet to the ground for Ranged, and he rears up dangling his feet for Magic.
TzTok-Jad (sometimes referred to as "702" or "Jad" because of its level and name, with no known correct pronunciation) is the final monster encountered in the TzHaar Fight Cave Minigame. Examining the monster yields the discouraging message "This is going to hurt..." TzTok-Jad is the highest level monster in all of RuneScape, and those who are skilled enough to defeat it are in for grand rewards...namely the Fire cape, the only animated cape in the game and arguably the cape with the best stats in the game.
Tactical Analysis
Tips
Probably the safest area.
Especially in later Waves (38+), you should stand in the northeastern corner as 3 of 5 spawns get stuck that way behind Italy Rock and the other rock to west. Getting the 2+ Prayer boost at Edgeville Monastery may be a help in the caves. Although its only a 2+ Prayer boost of out about 20 Super restores, it can help if it comes down to prayer-flicking Jad. Also, whenever killing a safespotted monster behind another one, kill the un-safespotted ones first, then immediately attack the safespotted one, as the death annimation of the un-safespotted one will allow you to get a free hit on the safespotted one(s). You can pause the rounds at anytime by clicking log out. If you finish the wave when logged in, you will be started on the next wave; if you log out before you finish, you will log in at the start of that wave again. This is also useful for letting your Hitpoints regenerate in-between rounds. You can log out, get the message, and finish the wave, and let your Hitpoints regenerate, or you can just safespot everything in the current wave and wait for your Hitpoints to regenerate. Prayer flicking Eagle or Hawk Eye on the high levels (360's) is useful if you can do it fast enough. It is also advised to turn auto-retaliate off during the caves as the 90's and 360's can lure you out of safespots, thus putting you in one and others path allowing you and 180's to melee you. Do not drink any Saradomin brews unless you have to; otherwise, wait until your Prayer is in need or could use refilling, so you don't waste any uses of your Super restores. Drink a dose of restore following 3 doses or brew.
Fire Cape
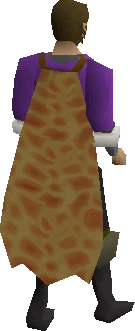
If one is successful in defeating TzTok-Jad, they receive 8,032 TokKul and the much-coveted Fire cape. This cape has an animated "lava" pattern. The animation shows lava flowing downwards continually.
A player wearing a fire cape.
The Fire Cape is considered the best cape in RuneScape It provides much more protection than the Cape of Legends and the Obsidian cape. It is, of course, nontradeable. The only capes better in any area are the God capes which provide a higher magic offensive bonus only, Ava's attractor or accumulator in ranged attack bonus, and the trimmed Capes of Achievement, which are only higher in Prayer.
Previously after redefeating TzTok-Jad, the player would receive 16,064 TokKul as a reward, which was highly inadvisable due to the high cost of each trip, but after an update, the Fire cape became a stackable item when placed in a player's bank allowing players to receive another Fire cape and TokKul as a reward if they dared to re-enter the caves.
Maps & Wave Breakdown
This is a map of the Fight Cave where the rocks to use for safe-spotting are. The famous Italy Rock is located east. Claw Rock is due north, and Long Rock is to the west.
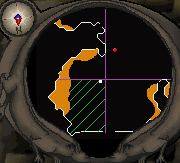
The red ovals at Italy Rock represent the safe spots. They're exactly where you want to be!
- 1.) 22 Try attacking then running to keep these from hitting you. Hit and run!
- 2.) 22, 22
- 3.) 45
- 4.) 45, 22
- 5.) 45, 22, 22
- 6.) 45, 45
- 7.) 90 Pray as these range as their range attack will be strong against a low level or mage.
- 8.) 90, 22
- 9.) 90, 22, 22
- 10.) 90, 45
- 11.) 90, 45, 22
- 12.) 90, 45, 22, 22
- 13.) 90, 45, 45
- 14.) 90, 90
- 15.) 180 Trap them behind Italy Rock, the big boot formation, you can't miss it.
- 16.) 180, 22 When safespotting, if the 22's or the 45's get stuck behind the 180's, kill them first to avoid taking any un-needed hits.
- 17.) 180, 22, 22
- 18.) 180, 45
- 19.) 180, 45, 22
- 20.) 180, 45, 22, 22
- 21.) 180, 45, 45
- 22.) 180, 90 <--Kill first. Then, kill 180. (Trap the 90 behind the 180 if possible, and lure them closer by moving away from them so you don't step out of the safespot when attacking them).
- 23.) 180, 90, 22 Pray against 90, Kill the 22 and then switch pray off.
- 24.) 180, 90, 22, 22
- 25.) 180, 90, 45
- 26.) 180, 90, 45, 22
- 27.) 180, 90, 45, 22, 22
- 28.) 180, 90, 45, 45
- 29.) 180, 90, 90
- 30.) 180, 180 Make sure you have full health. Drink a Sara brew before going on to the next wave.
- 31.) 360 Never turn mage pray off unless you are 100% sure there are no 360's around.
- 32.) 360, 22 Kill the 22's first!
- 33.) 360, 22, 22
- 34.) 360, 45
- 35.) 360, 45, 22
- 36.) 360, 45, 22, 22
- 37.) 360, 45, 45
- 38.) 360, 90 Don't pray range as the 360's mage could kill you. Before this wave, make sure you have full health.
- 39.) 360, 90, 22 <--Kill the 22, 90, and then 360.
- 40.) 360, 90, 22, 22
- 41.) 360, 90, 45
- 42.) 360, 90, 45, 22
- 43.) 360, 90, 45, 22, 22
- 44.) 360, 90, 45, 45
- 45.) 360, 90, 90
- 46.) 360, 180 Try to get the 180 trapped behind the 360.

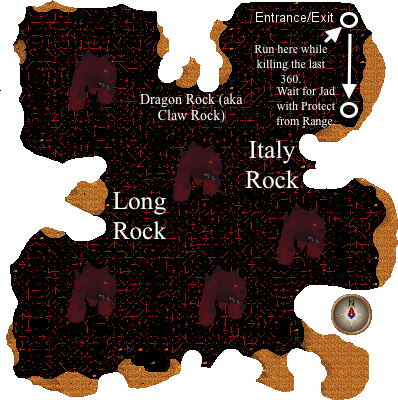
Jad spawns are indicated as well as potential Jad safe spots if lucky.
- 47.) 360, 180, 22
- 48.) 360, 180, 22, 22
- 49.) 360, 180, 45
- 50.) 360, 180, 45, 22
- 51.) 360, 180, 45, 22, 22
- 52.) 360, 180, 45, 45
- 53.) 360, 180, 90 Try to get the 180 trapped behind the 360. Kill the 90, and then the 360 and then the 180.
- 54.) 360, 180, 90, 22
- 55.) 360, 180, 90, 22, 22
- 56.) 360, 180, 90, 45
- 57.) 360, 180, 90, 45, 22
- 58.) 360, 180, 90, 45, 22, 22
- 59.) 360, 180, 90, 45, 45
- 60.) 360, 180, 90, 90 Ouch!
- 61.) 360, 180, 180
- 62.) 360, 360 Make sure you have full health.
- 63.) 702 TzTok-Jad, 4 108 healers when 702 at half health